

All Security Drone locations - Destiny 2
Where to find all 50 Security Drones in Destiny 2 during Season of the Seraph.
There are 50 Security Drones for players to find in Destiny 2: Season of the Seraph. The drones are tucked away across six different areas and missions, and must be destroyed in order to claim the Drone Destruction and Guardian’s Best Friend Triumphs. Below is the location of each Security Drone.
- Moon Security Drones
- Europa Security Drones
- Heist Battleground: Moon Security Drones
- Heist Battleground: Mars Security Drones
- Heist Battleground: Europa Security Drones
- Operation: Seraph’s Shield Security Drones
Security Drone locations
Before you begin, much like Savathun’s Eyes, Entropic Shards, and Darkness Rifts, the Security Drones can only be destroyed with a specific Exotic: Revision Zero. This Exotic Pulse Rifle is rewarded from the quest, Operation: Seraph’s Shield – so it’s not too hard to get.
When all the Security Drones are destroyed, the Drone Destruction Triumphs can be claimed. This is also a necessary step in acquiring the Guardian’s Best Friend Triumph. Take a look at our Season of the Seraph Triumph guide for more information.
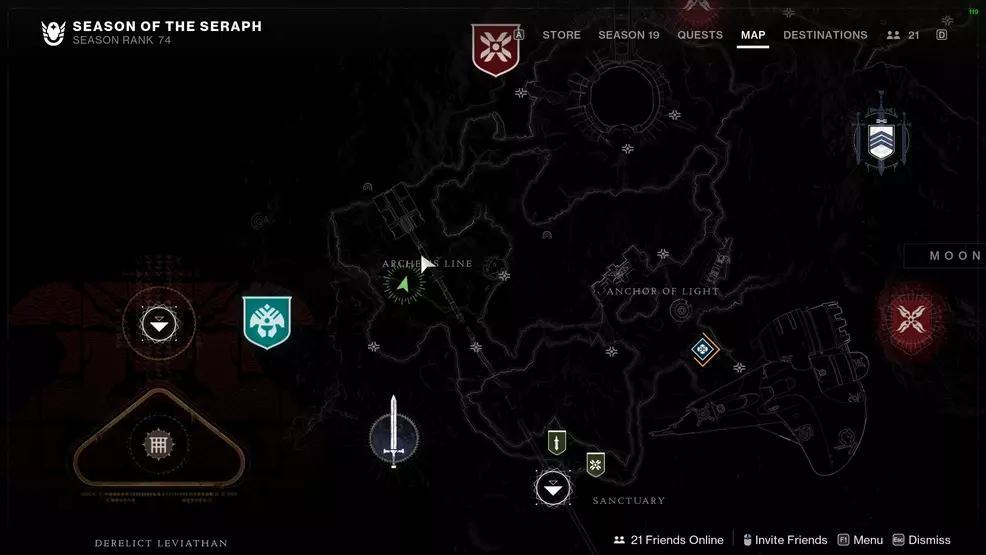
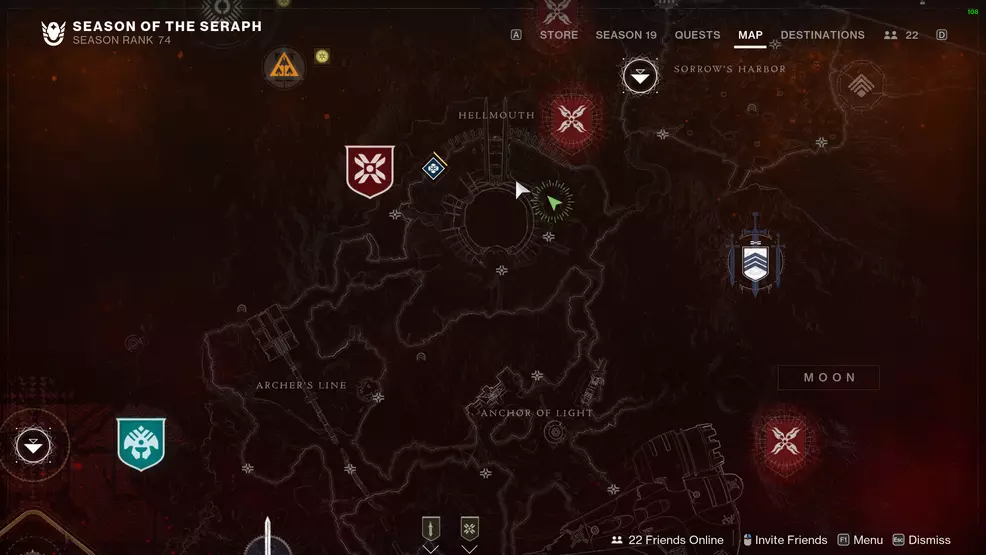
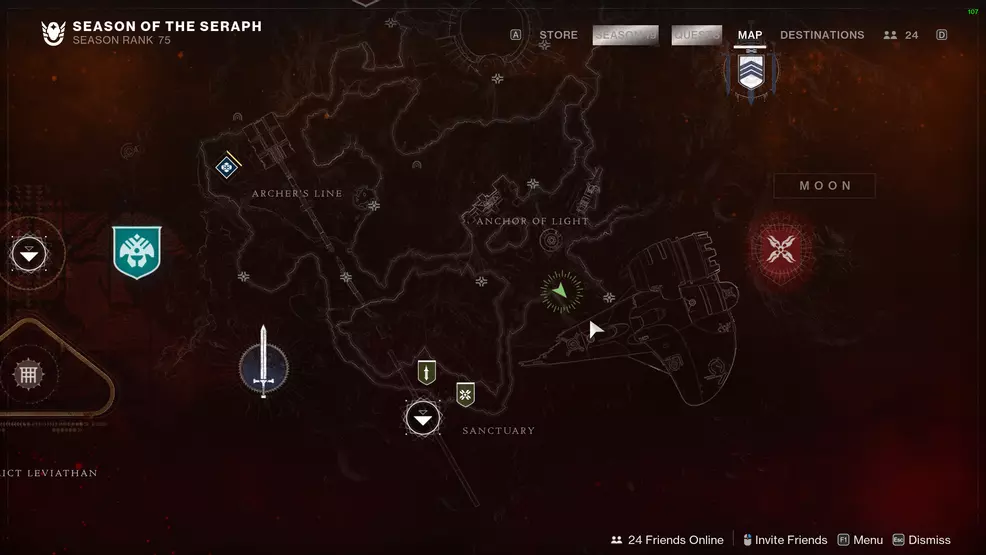
Moon Security Drones
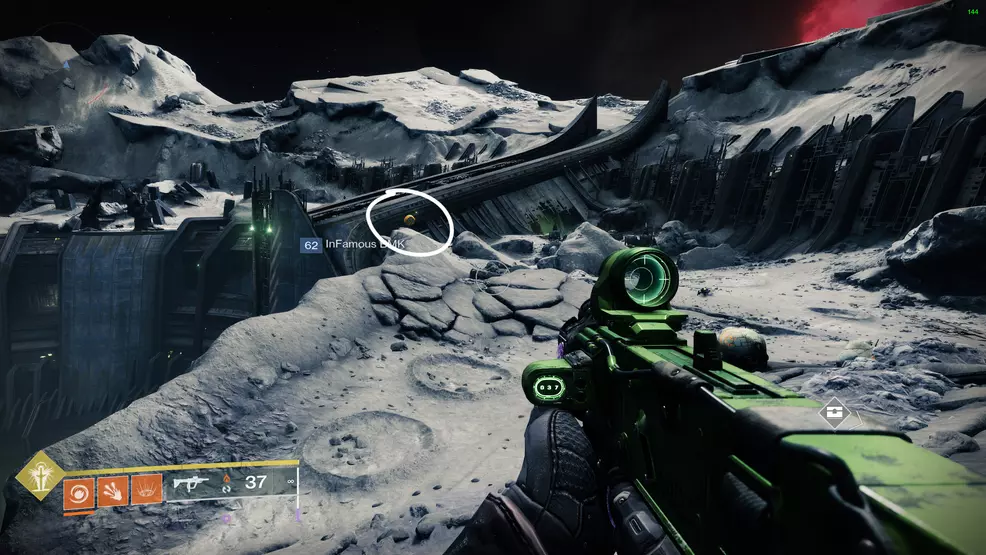
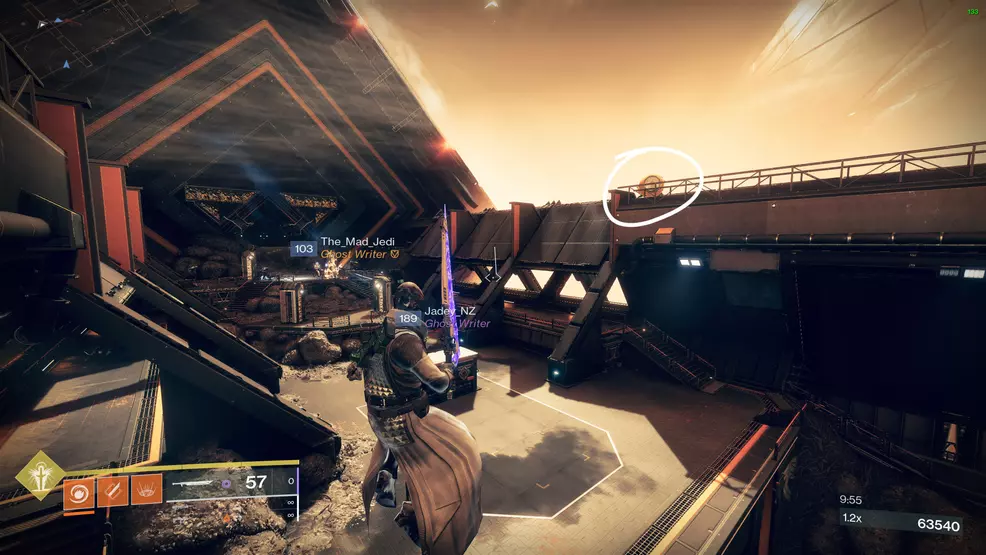
Moon Security Drone – Archer’s Line
Source: Shacknews
Source: Shacknews
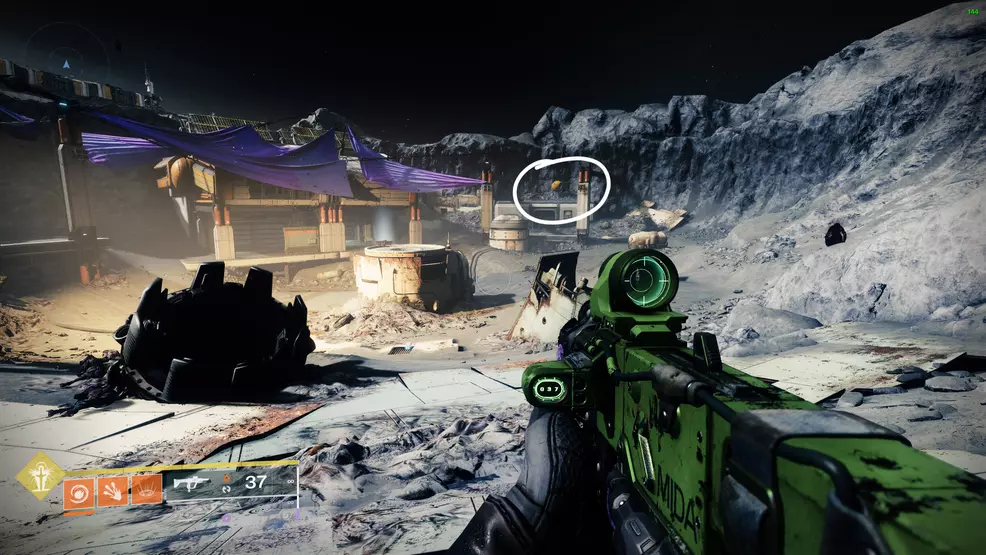
The first security drone on the Moon is in Archer’s Line, on top of the actual line heading into the building. Look for it above the bunker right before the main building.
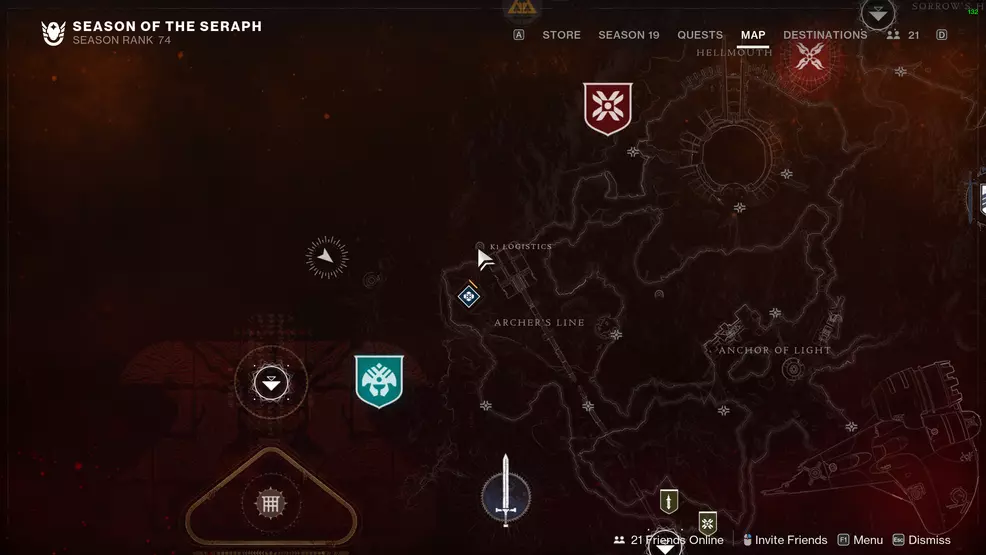
Moon Security Drone – K1 Logistics
Source: Shacknews
Source: Shacknews
The security drone in the K1 Logistics Lost Sector in Archer’s Line is at the end in the boss arena. It’s floating to the right of the chest, above the building.
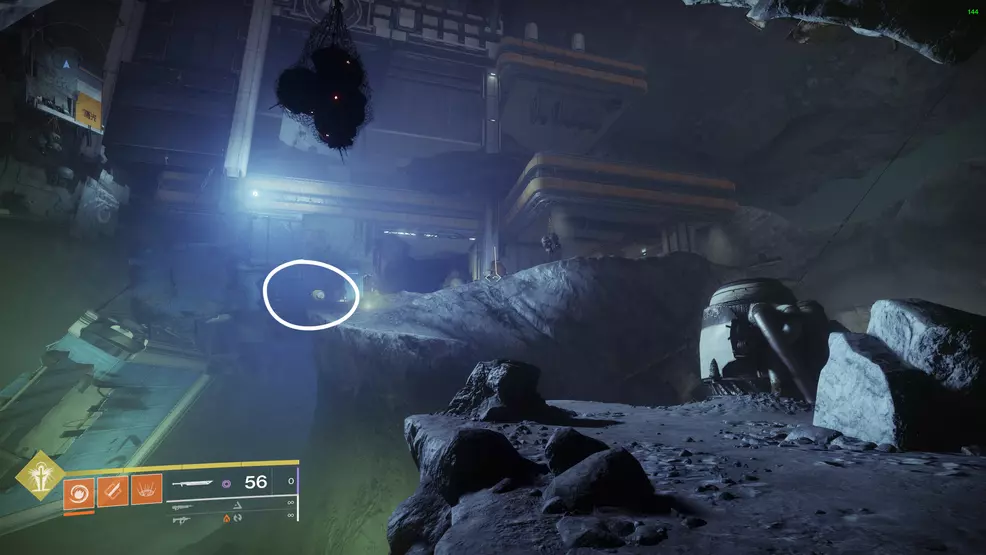
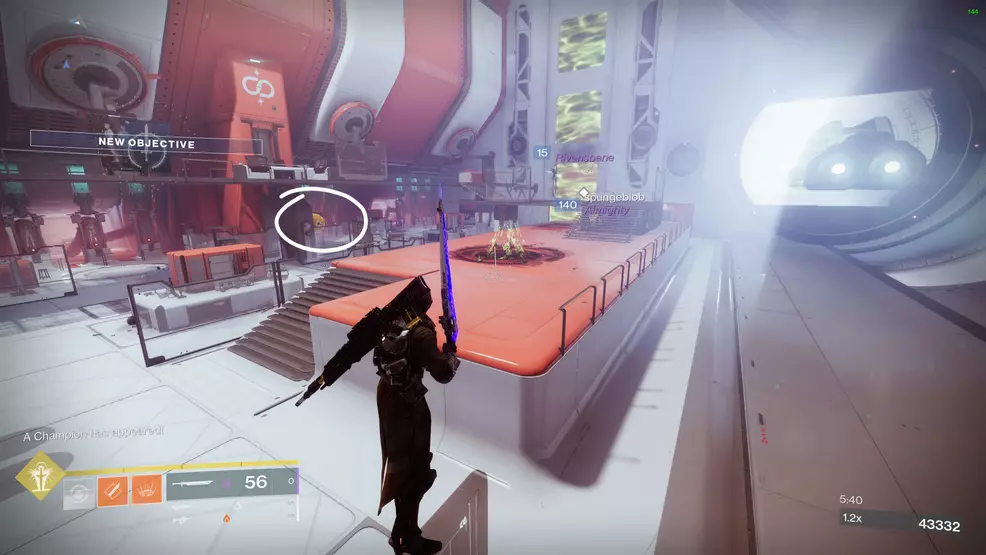
Moon Security Drone – Hellmouth 1
Source: Shacknews
Source: Shacknews
This drone is outside of the K1 Crew Quarters Lost Sector in the Hellmouth. It is on top of the large antenna in the middle of the area.
Moon Security Drone – K1 Crew Quarters
Source: Shacknews
Source: Shacknews
The drone in K1 Crew Quarters in the Hellmouth is right before the boss fight. You’ll see it as you jump across the gap to reach the upper level.
Moon Security Drone – Hellmouth 2
Source: Shacknews
Source: Shacknews
Find this security drone in the north of the Hellmouth, right on the lip into the hole. It’s near the structure that leads down into the guts of the Moon.
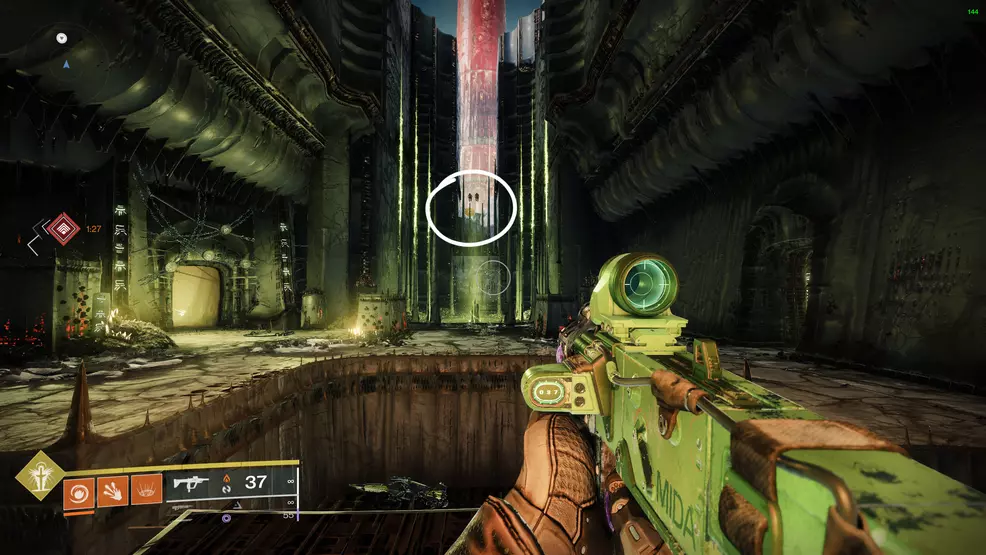
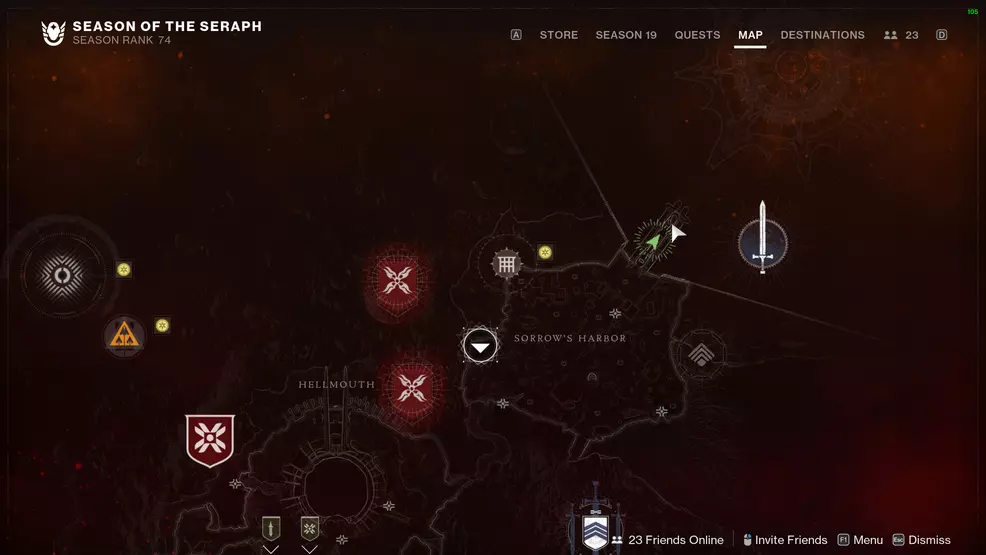
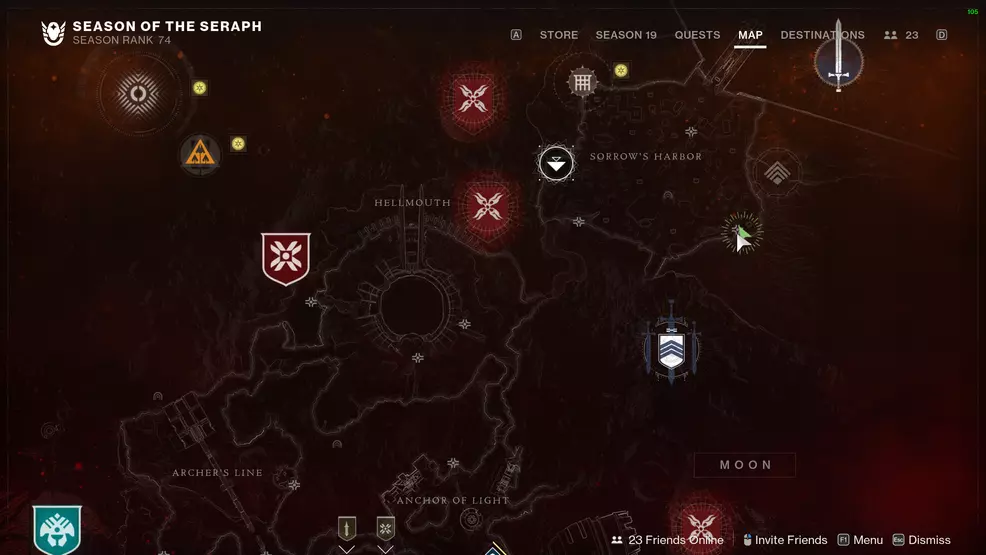
Moon Security Drone – Sorrow’s Harbor 1
Source: Shacknews
Source: Shacknews
This drone is inside the Scarlett Keep to the north of Sorrow’s Harbor. Go into the building and cross to the other side to spot it behind the bars.
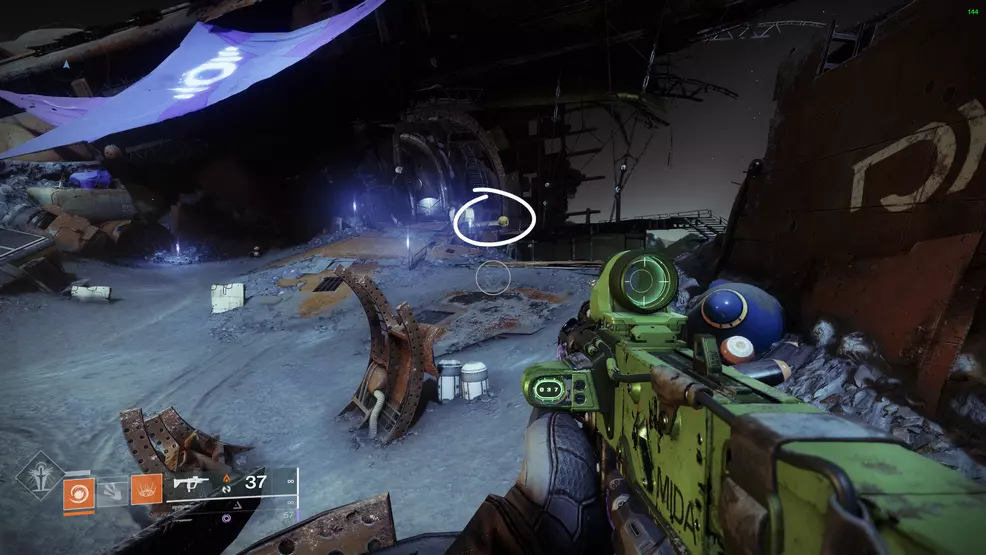
Moon Security Drone – Sorrow’s Harbor 2

Source: Shacknews
Source: Shacknews
Another security drone is in Sorrow’s Harbor, to the southeast on a Hive structure. It’s behind one of the little spines, right near the edge of the map. In fact, it’s right by the regional chest marker on the map.
Moon Security Drone – K1 Revelation
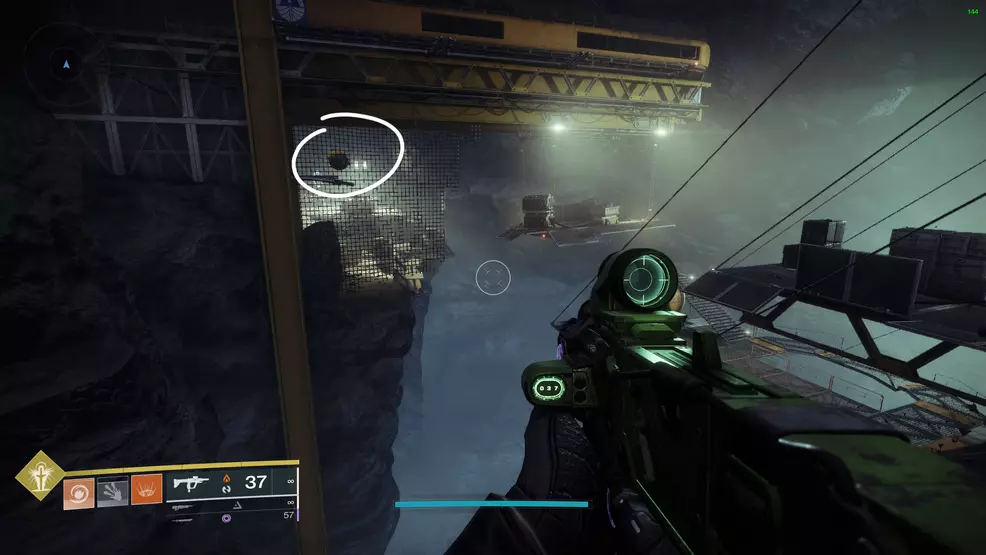
Source: Shacknews
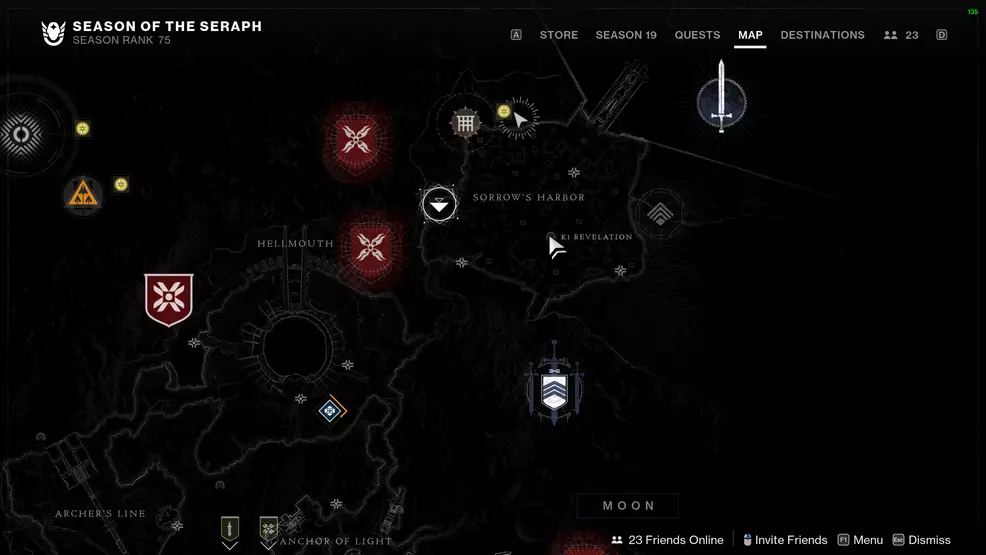
Source: Shacknews
The drone in the K1 Revelation Lost Sector in Sorrow’s Harbor is behind the netting near the Shrieker. As you enter the area and reach the platforms to jump across, look left to spot it floating in the air.
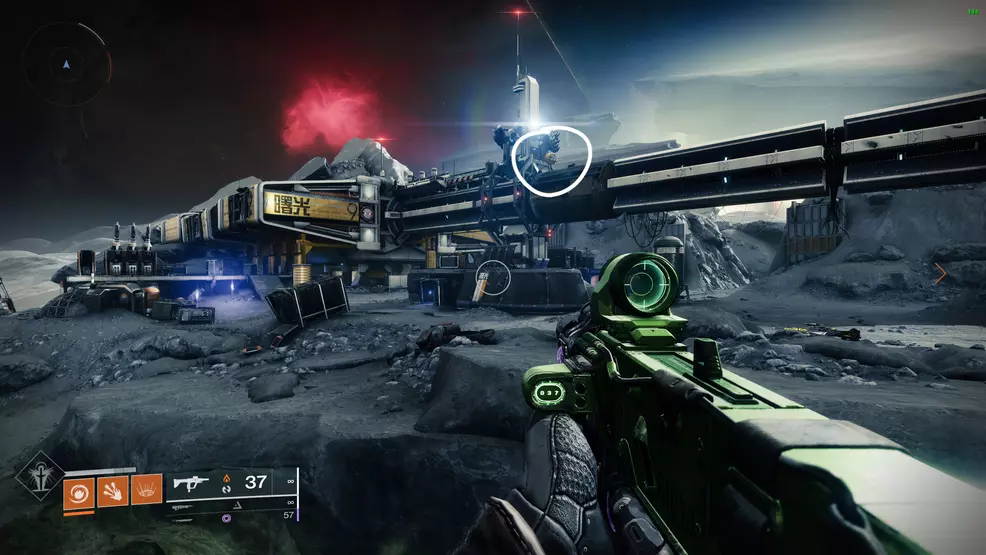
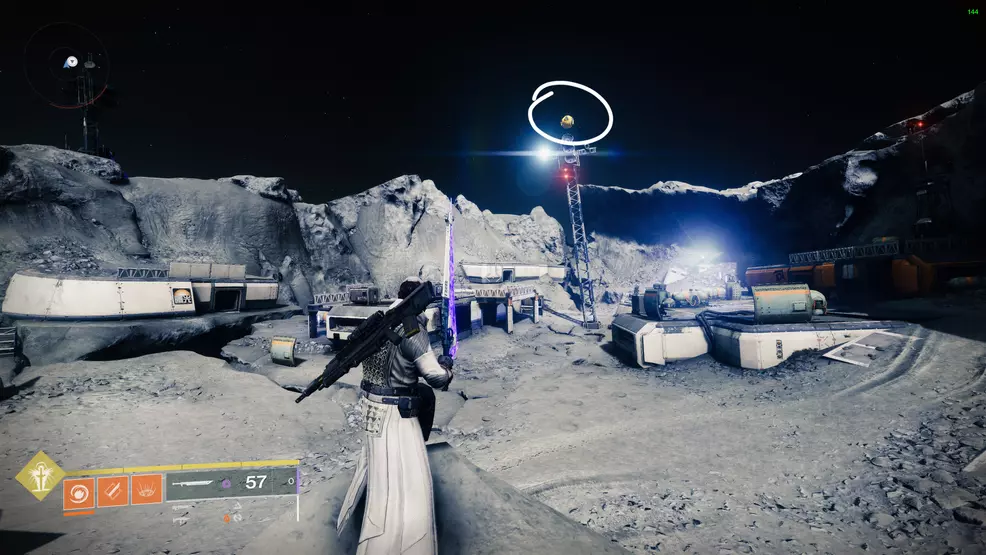
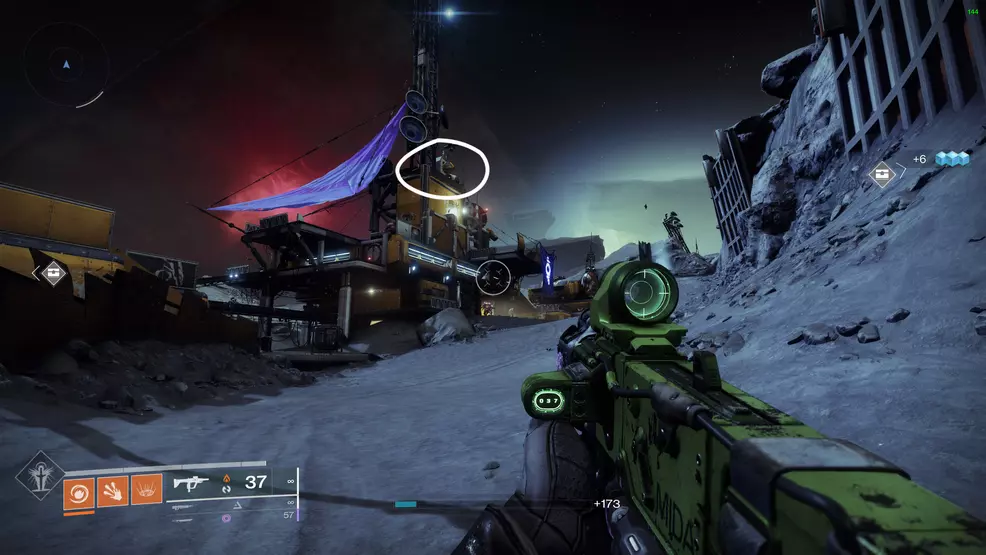
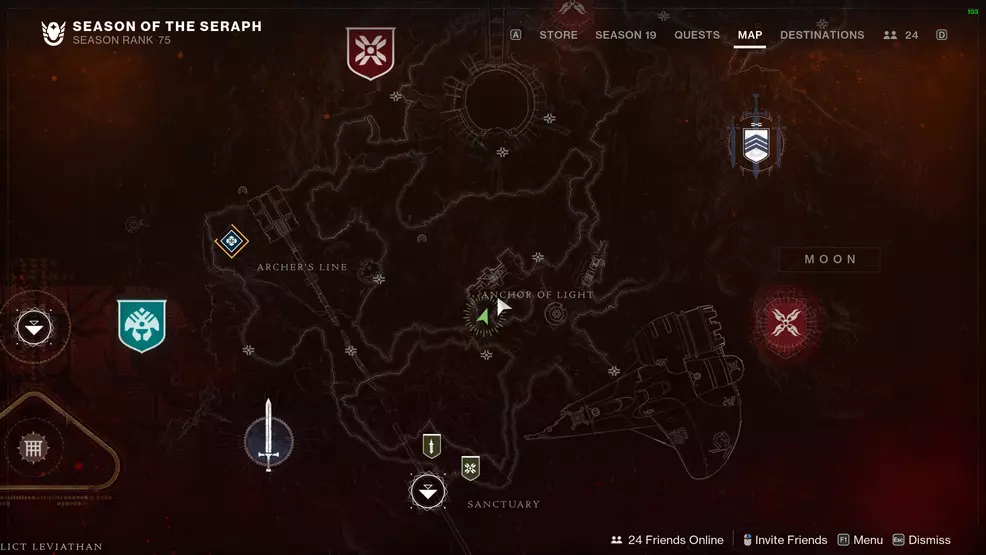
Moon Security Drone – Anchor of Light 1
Source: Shacknews
Source: Shacknews
Find this drone in Anchor of Light, to the right near the crashed Fallen Ketch. This is where public events appear. The drone is sitting out in the open on the platform.
Moon Security Drone – Anchor of Light 2
Source: Shacknews
Source: Shacknews
The last security drone in the Anchor of Light is to the northwest, at the building with the antenna. It’s floating up high above the area.
Europa Security Drones
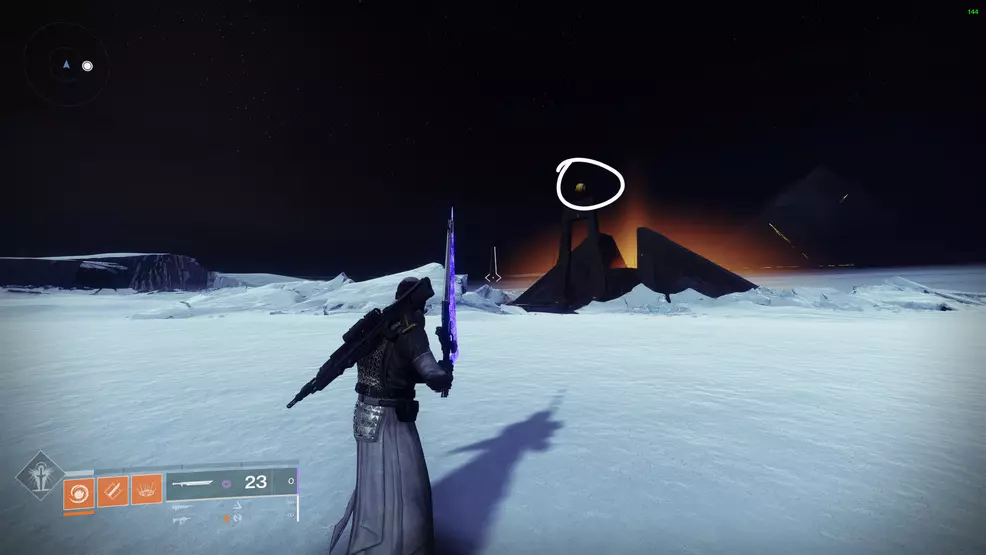
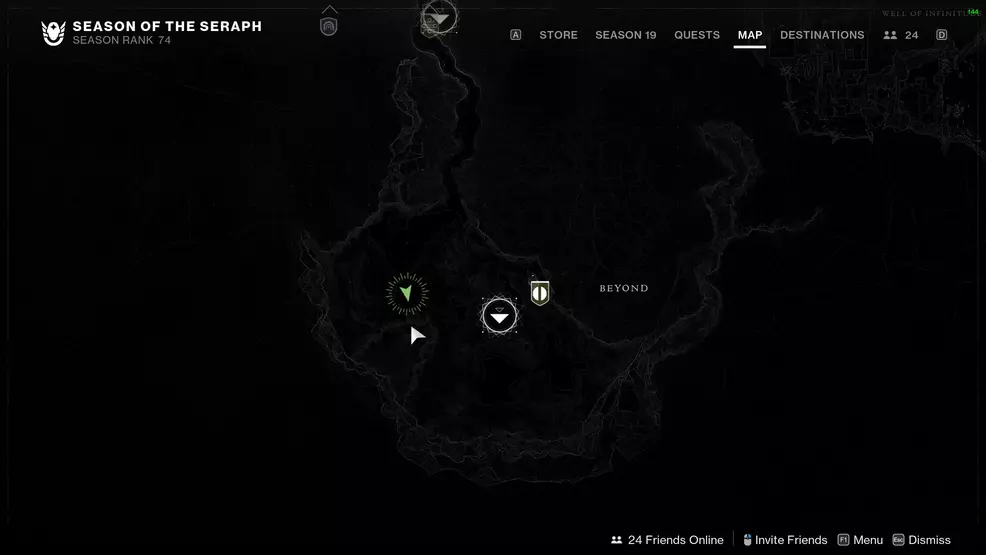
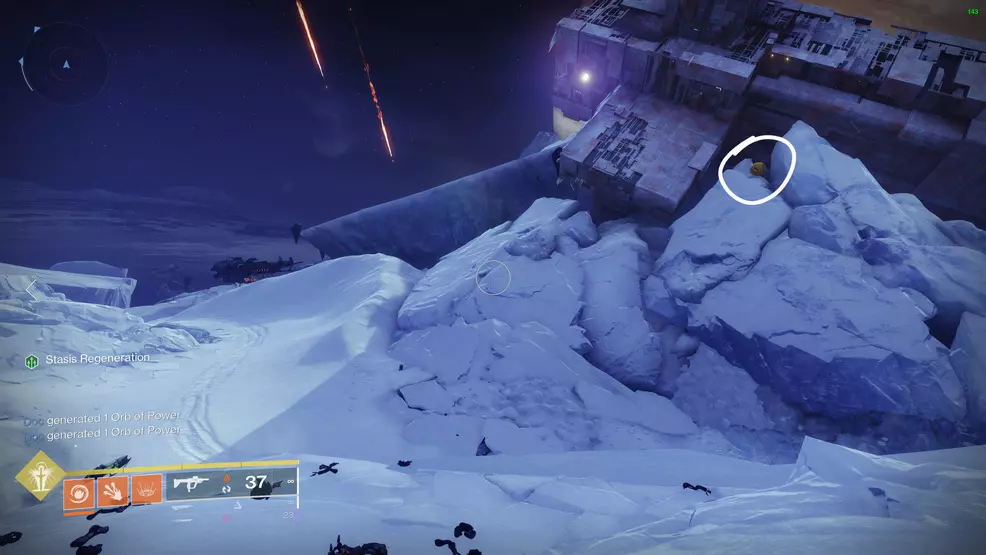
Europa Security Drone – Beyond
Source: Shacknews
Source: Shacknews
The first security drone in Europa is found at Beyond, on the archway at the Darkness Ziggurat to the south. This is the same location where you gain the Stasis abilities.
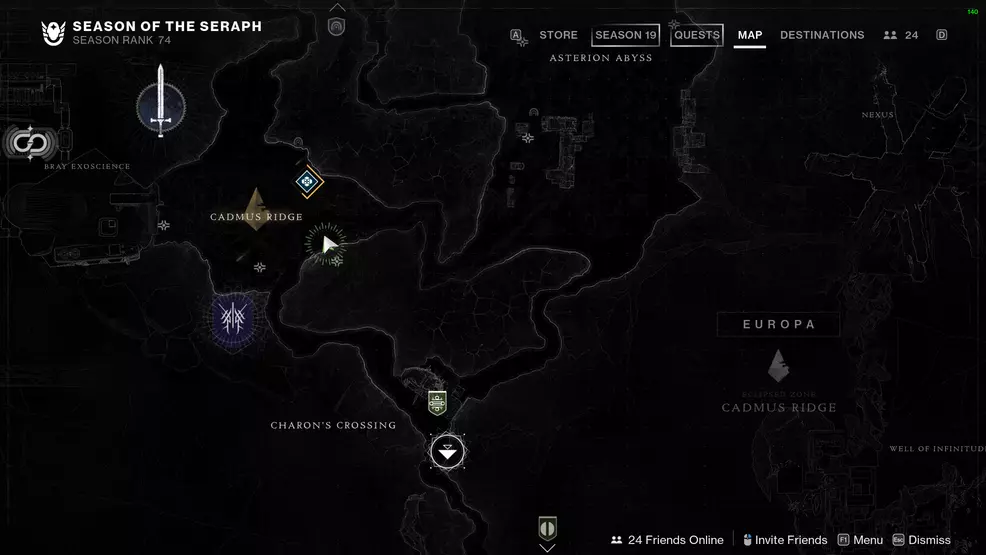
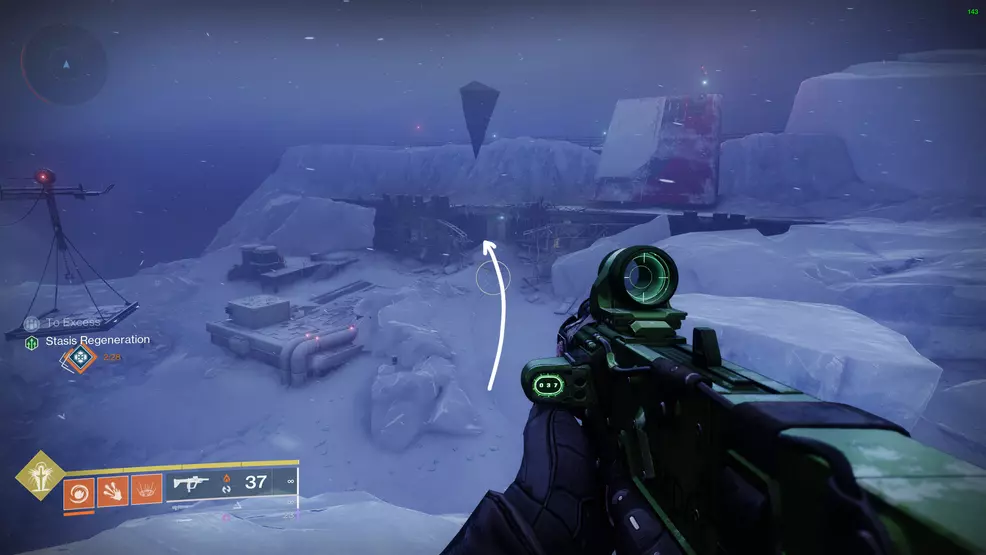
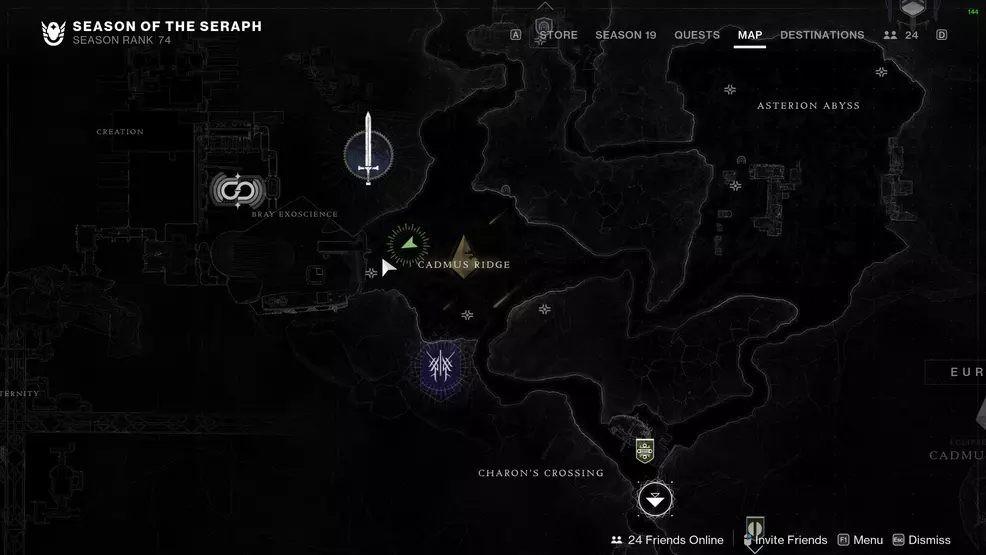
Europa Security Drone – Cadmus Ridge 1
Source: Shacknews
Source: Shacknews
This drone is in Cadmus Ridge, on the snow around the Vex structure. It can be seen when entering the area from Charon’s Crossing.
Europa Security Drone – Cadmus Ridge 2
Source: Shacknews
Source: Shacknews
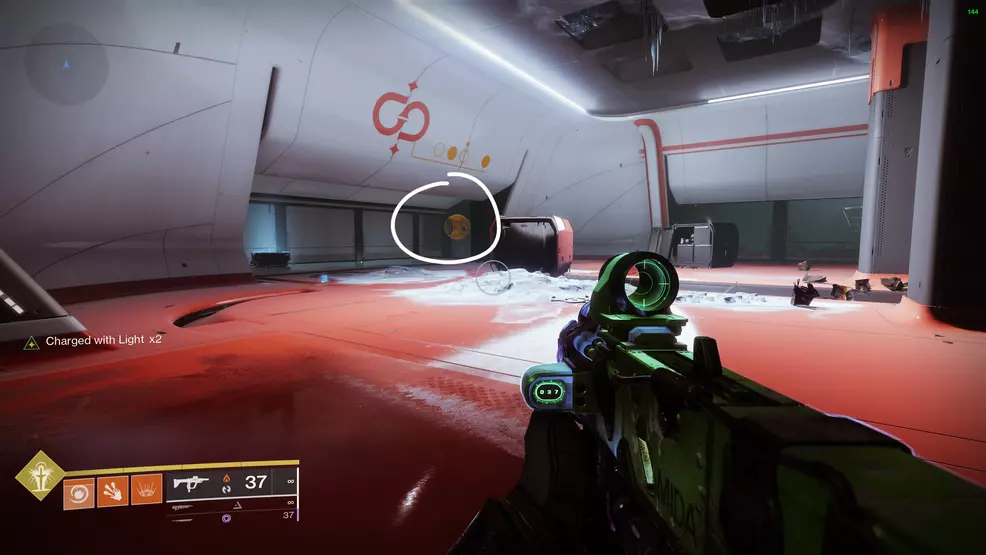
Find this drone at the entrance to Bray Exoscience in Cadmus Ridge. Approach the building where the wall has been destroyed. Instead of going inside, look left to see it tucked behind the wall.
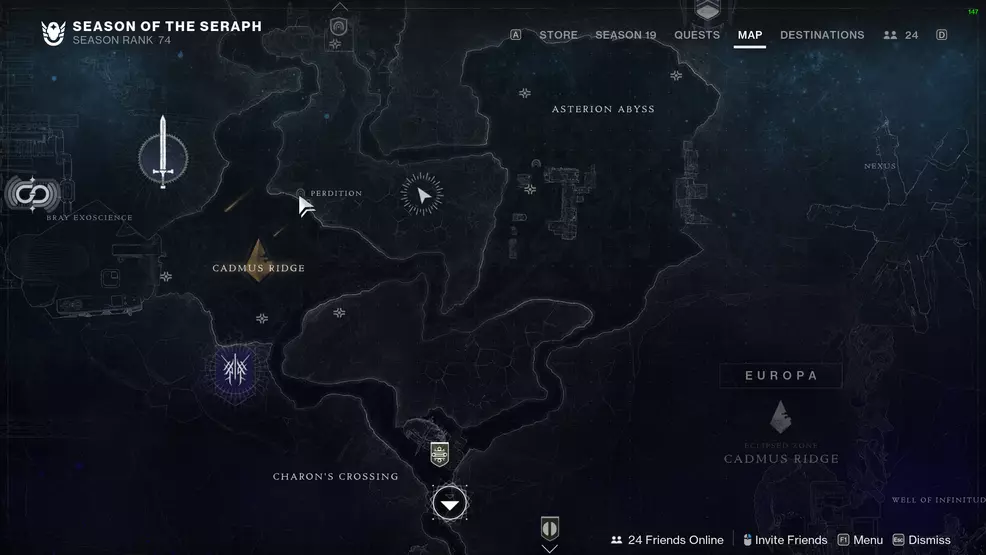
Europa Security Drone – Perdition
Source: Shacknews
Source: Shacknews
The drone is in the Perdition Lost Sector in Cadmus Ridge, beside the boss chest.
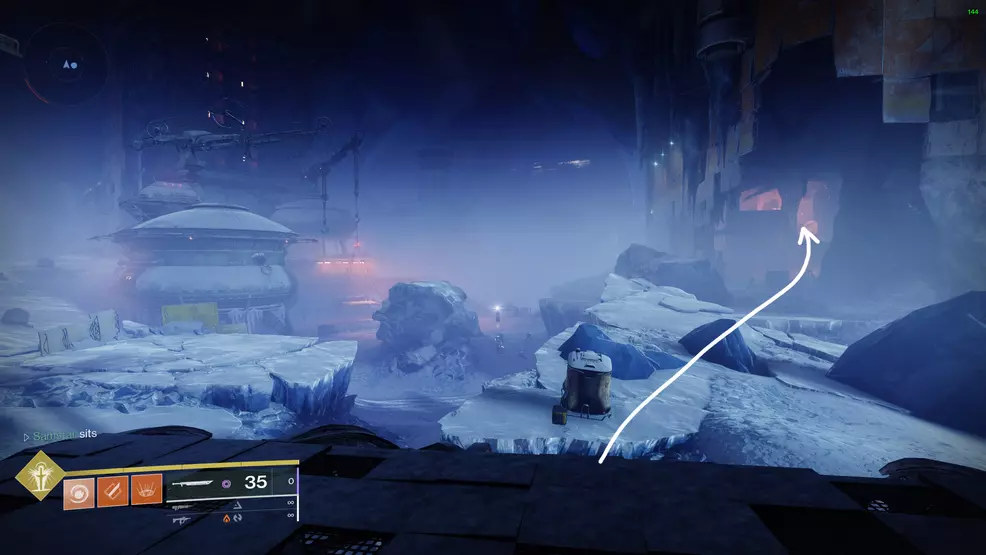
Europa Security Drone – Eventide Ruins 1
Source: Shacknews
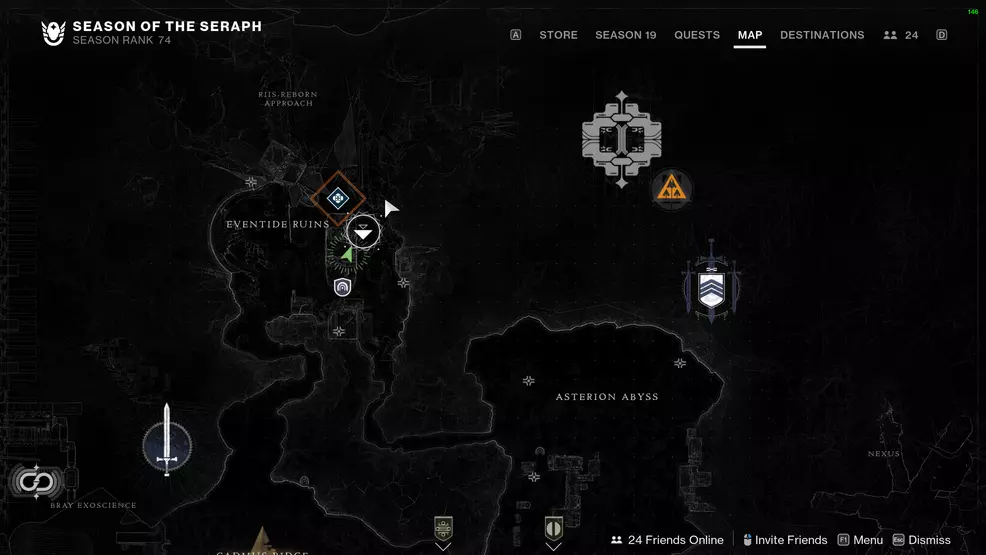
Source: Shacknews
This security drone is in Eventide Ruins, at the entrance to the Deep Stone Crypt raid, to the right of the fast travel point.
Source: Shacknews
From the fast travel point, go into the destroyed building on your right. Go up the hill to the back of the room to find a spherical hatch. The drone is to the left of the hatch.
Europa Security Drone – Eventide Ruins 2
Source: Shacknews

Source: Shacknews
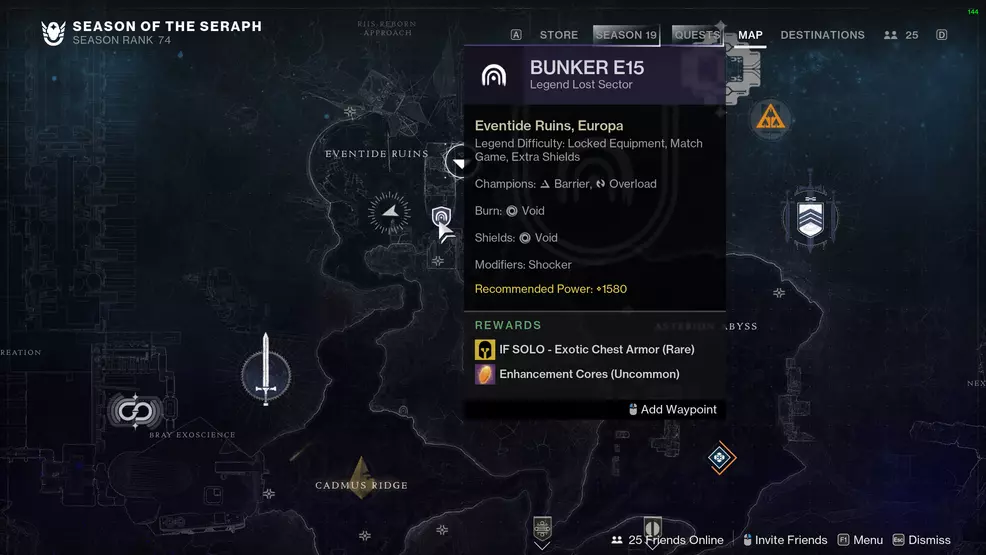
Go into the center building in Eventide Ruins, the one used to access the Bunker E15 Lost Sector. The drone is on a balcony above the Lost Sector hole.
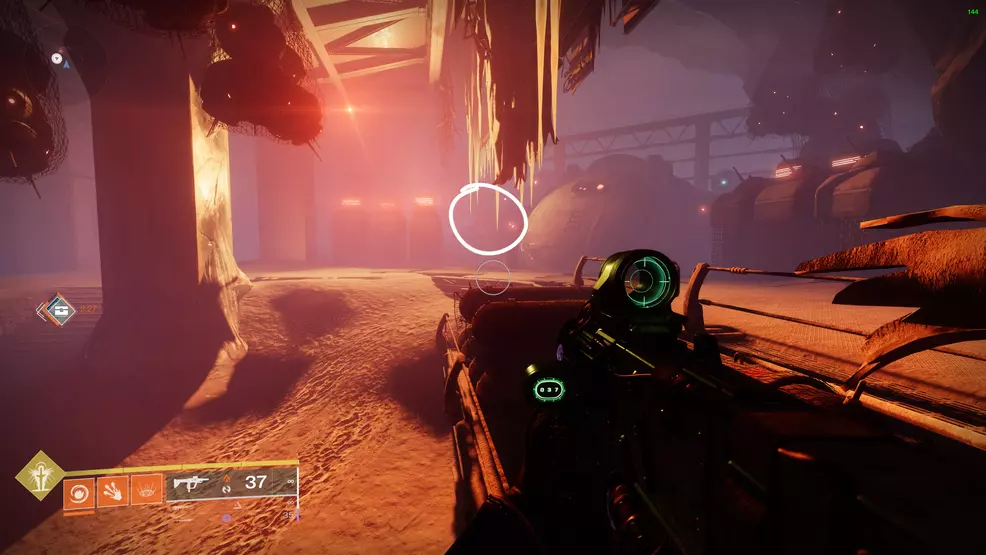
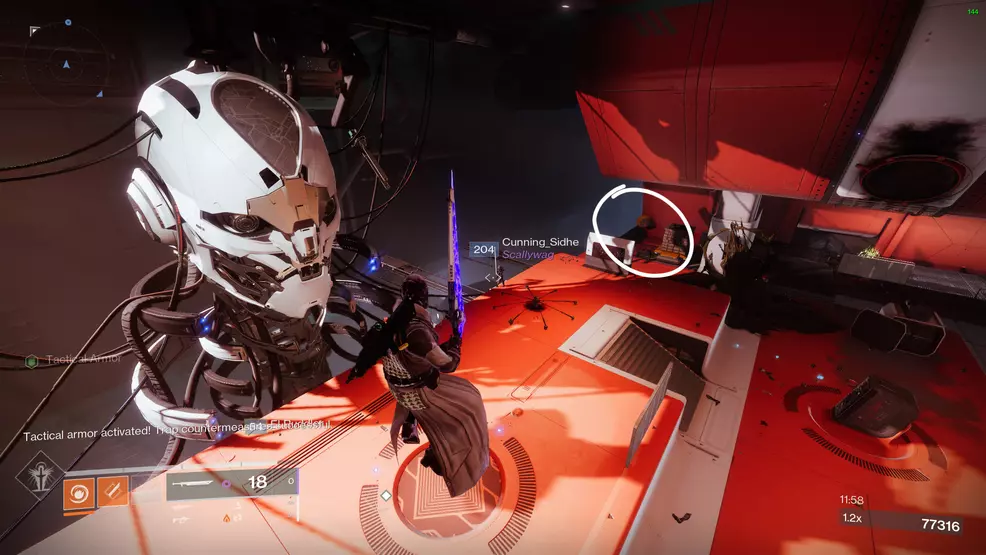
Europa Security Drone – Bunker E15
Source: Shacknews
Source: Shacknews
The drone in Bunker E15 in Eventide Ruins is in the room before the boss fight. As you enter, look across the room to where Frames are trapped in a Vex cage. Walk up the stairs to reach a catwalk above the Vex cage that leads to a small room with the drone. You would have seen this drone behind the glass right before the large room.
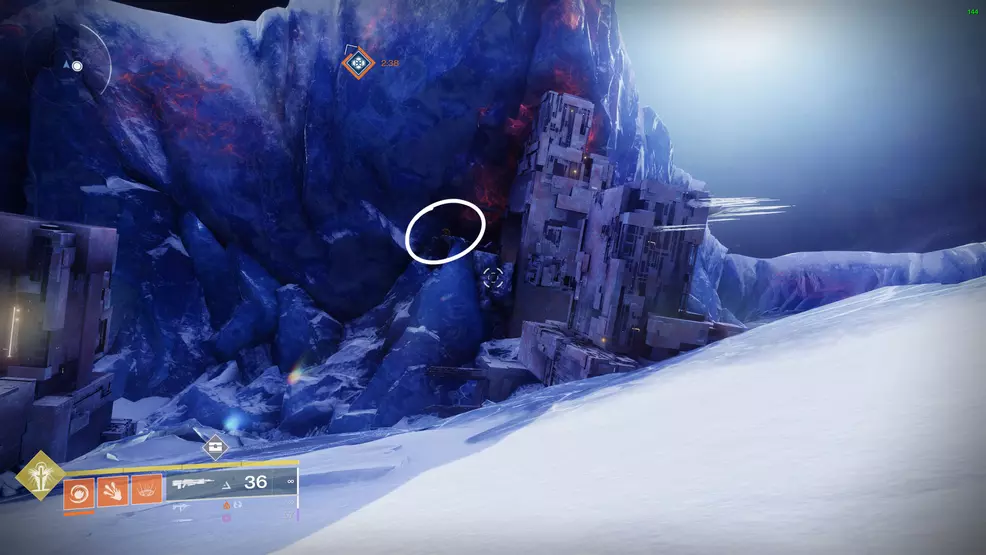
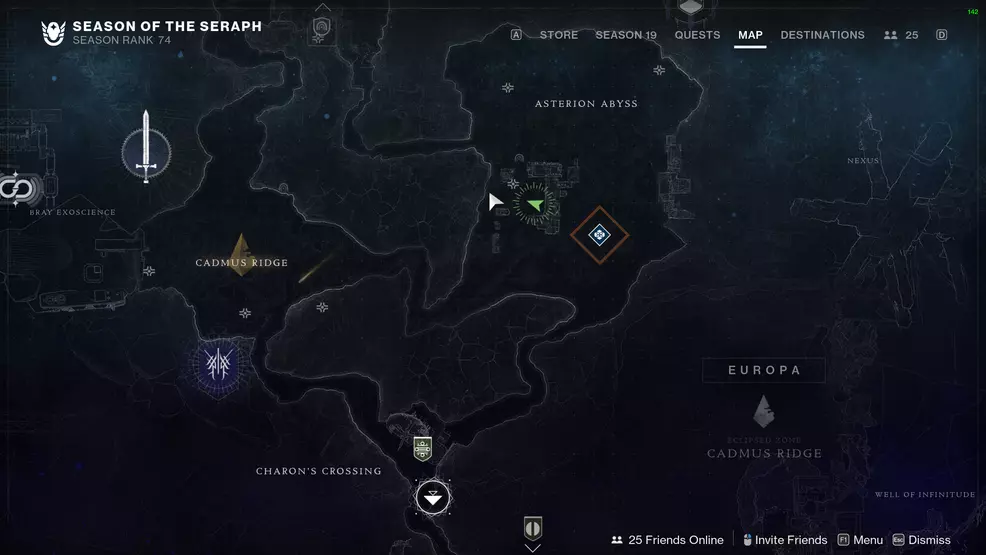
Europa Security Drone – Asterion Abyss 1
Source: Shacknews
Source: Shacknews
This security drone is on the western cliff in Asterion Abyss. Look for where the Vex structure tilts out of the cliff face.
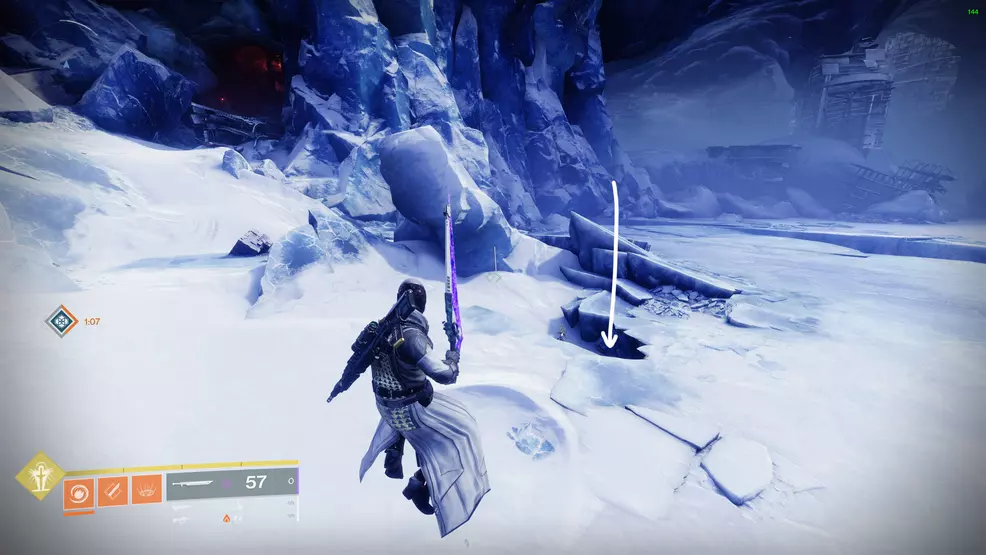
Europa Security Drone – Asterion Abyss 2
Source: Shacknews

Source: Shacknews
Another security drone is in Asterion Abyss, in a hole in the ground near the path to Eventide Ruins. It is actually right on top of the region golden chest marker on the map.
Europa Security Drone – Concealed Void
Source: Shacknews
The security drone in the Concealed Void Lost Sector in Asterion Abyss is in the large room with the platforms, Radiolarian fluid, and Fallen. The ball is sandwiched between the Vex structure, near the Fallen terminal.
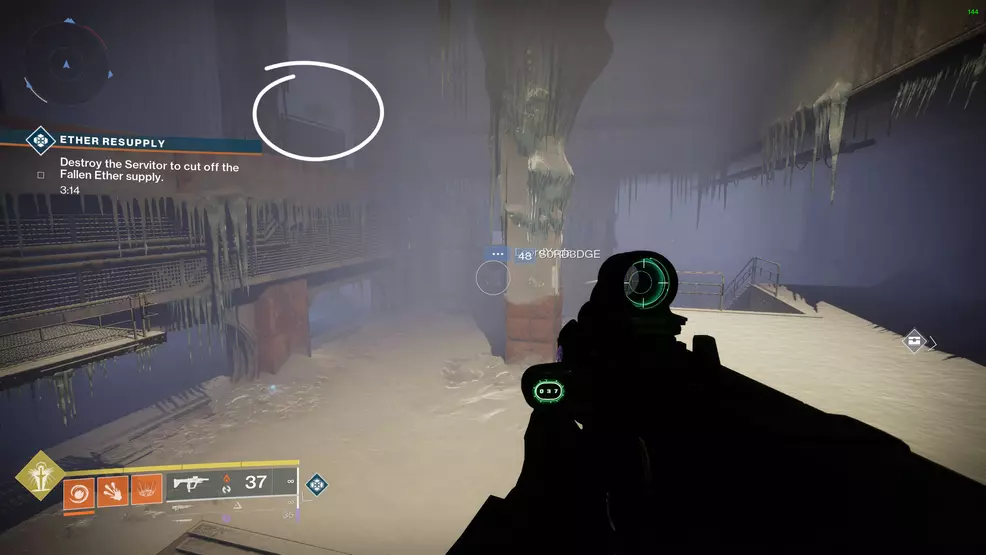
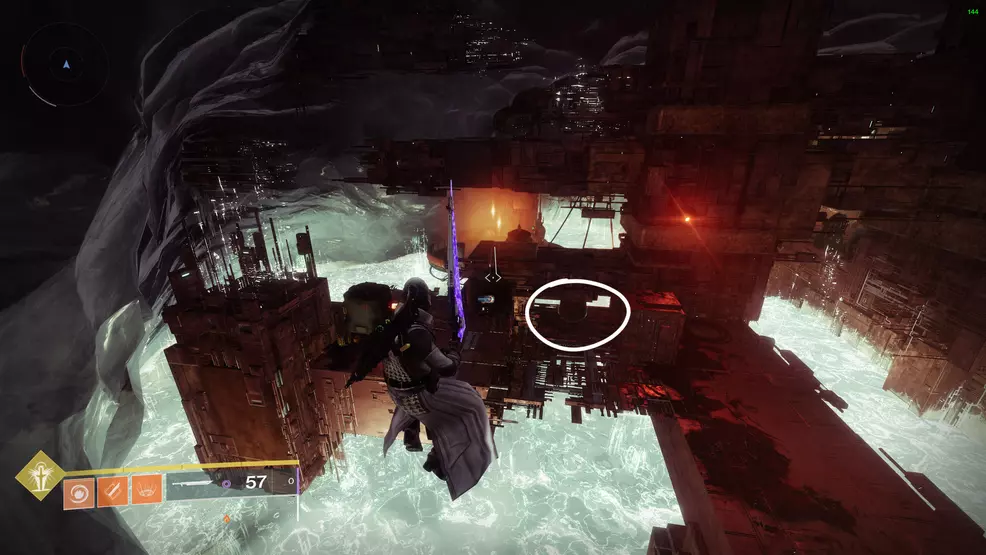
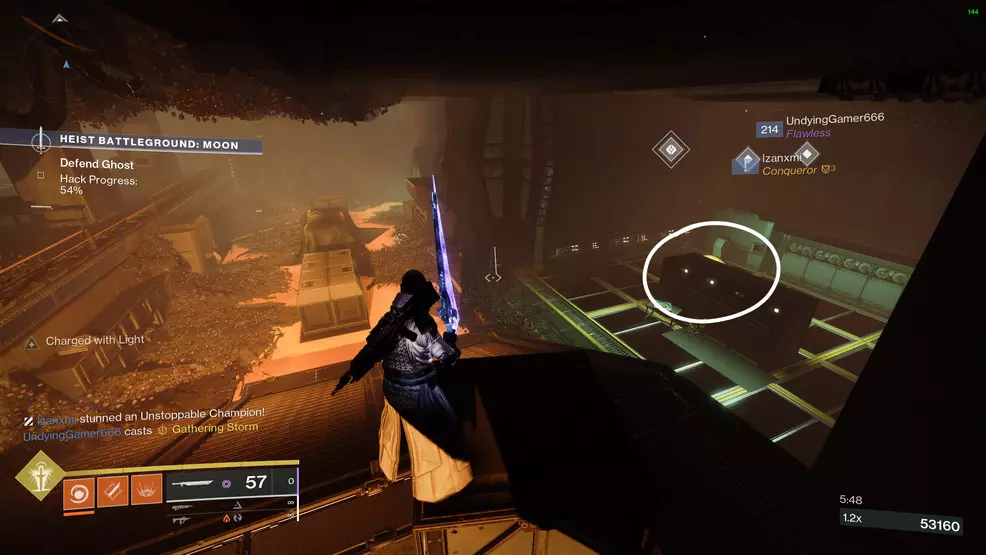
Heist Battleground: Moon Security Drones
Heist Battleground: Moon Security Drone 1
Source: Shacknews
The first security drone in the Moon Heist Battleground is on the cliff overlooking the first Hive Cryptolith. It’s beside some fuel canisters.
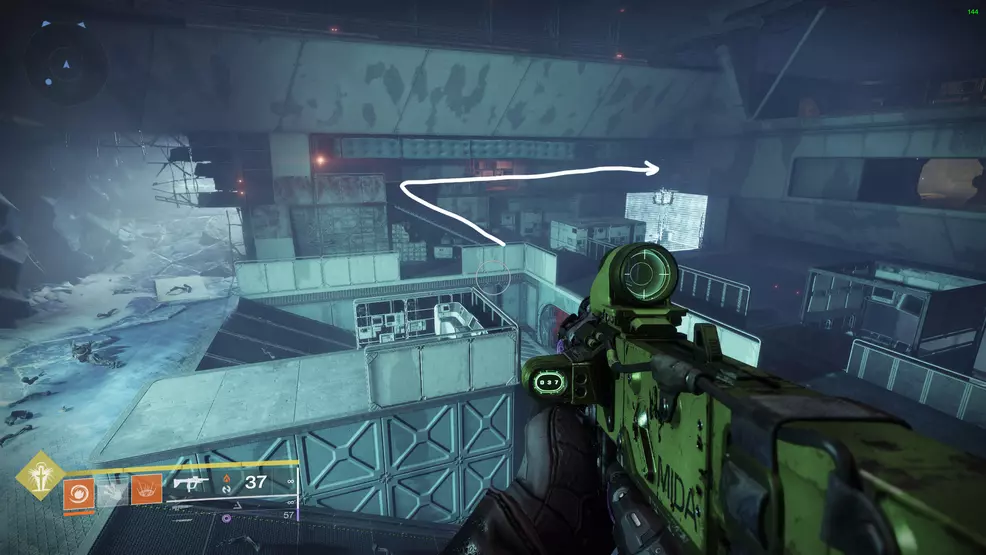
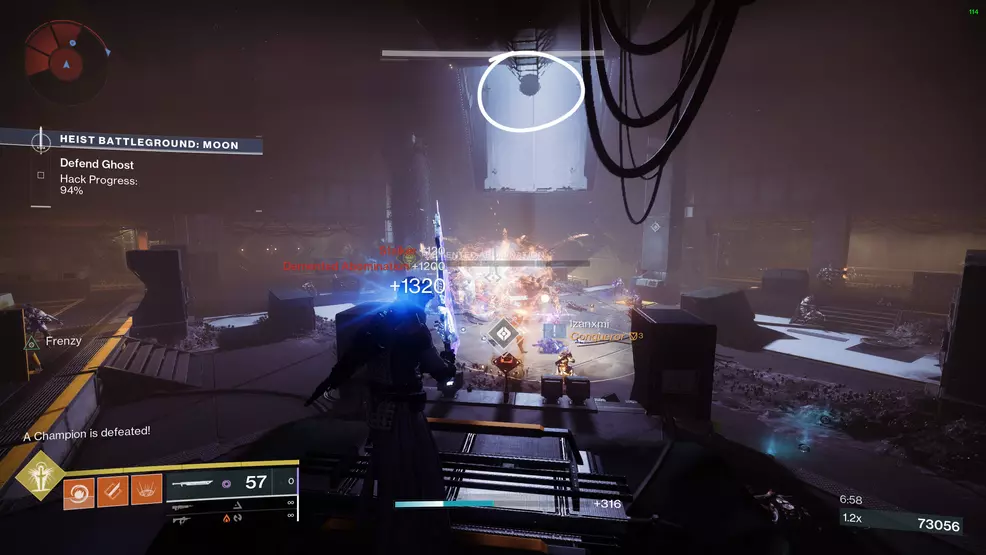
Heist Battleground: Moon Security Drone 2
Source: Shacknews
This drone is part way down the slide into the Warmind base, on the left. Either stand at the top and shoot it, destroy it while sliding down, or get it when you’re at the bottom.
Heist Battleground: Moon Security Drone 3
Source: Shacknews
After the slide, look for the symmetrical room with the glass on an angle. The yellow ball is to the right. This is a few rooms before the wave defense section.
Heist Battleground: Moon Security Drone 4
Source: Shacknews
This drone is immediately after the previous one. Continue into the room with the stairs that lead down and look for a small open room on the right. This room will have old computer terminals, behind which is the drone.
Heist Battleground: Moon Security Drone 5
Source: Shacknews
A drone is in the room where you hold out against waves of enemies. It’s floating in the middle of the room, by the angled glass.
Heist Battleground: Moon Security Drone 6
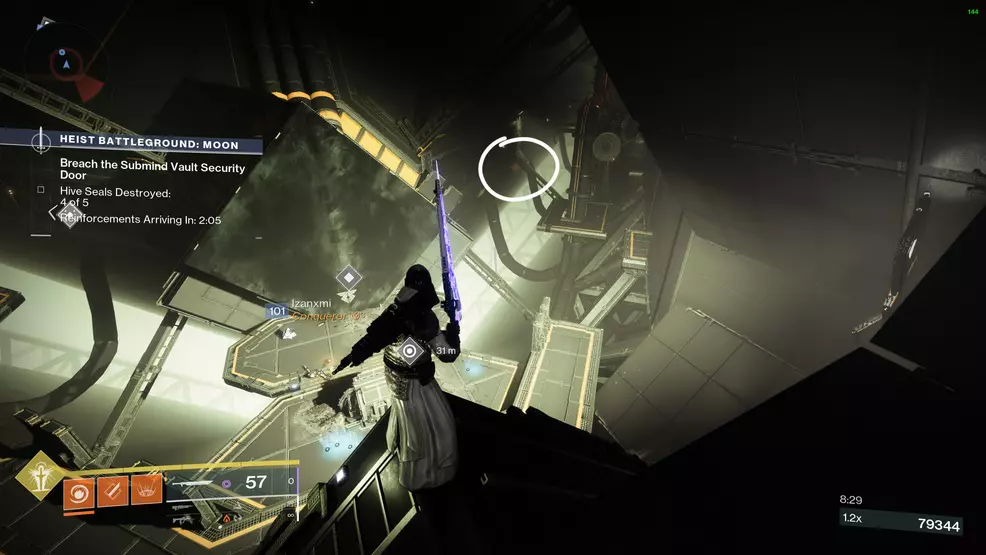
Source: Shacknews
The last drone in the Heist Battleground: Moon is at the final door locked with Hive runes. It is to the right of the door, by the tubing.
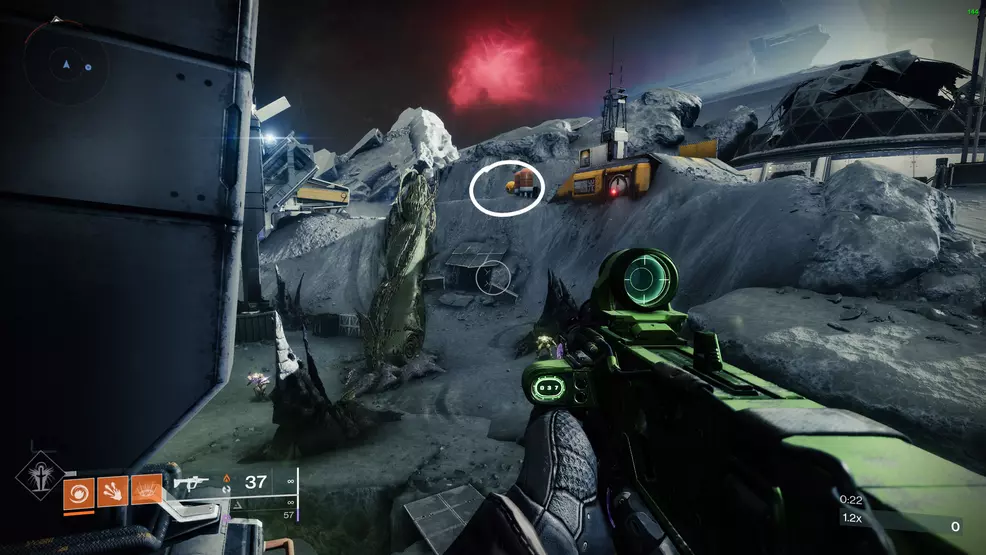
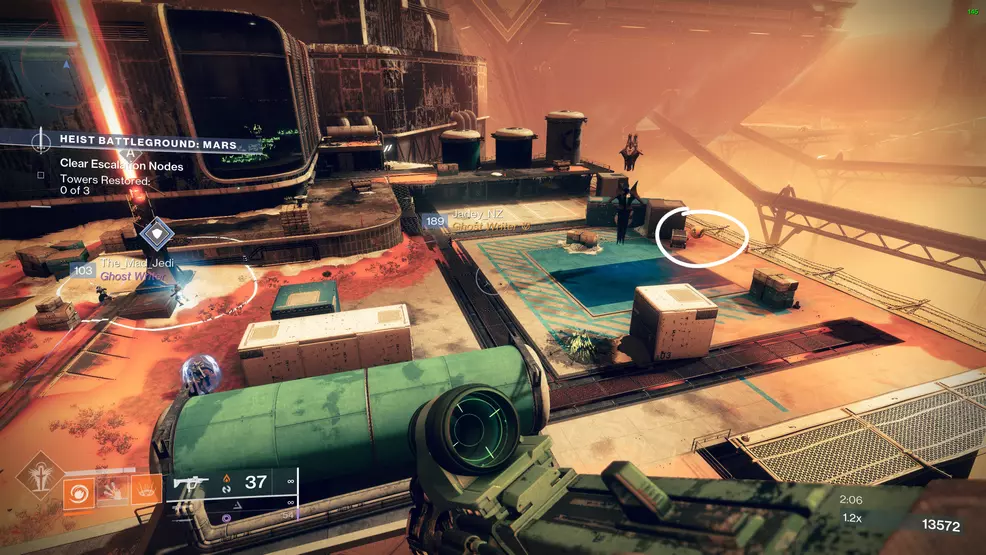
Heist Battleground: Mars Security Drones
Heist Battleground: Mars Security Drone 1
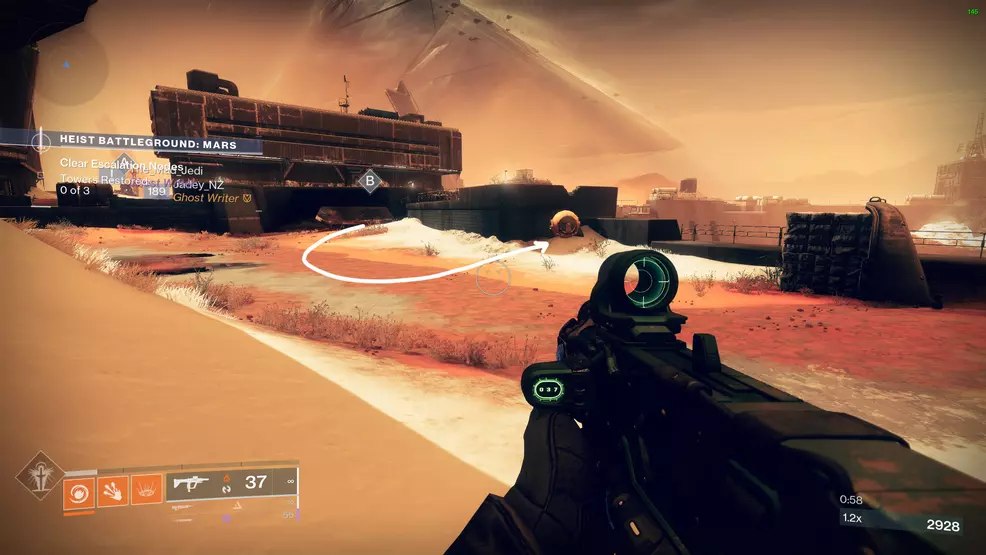
Source: Shacknews
The first security drone in Heist Battleground: Mars is to the left of Warmind Tower B. Follow the path along to find the drone near the railing.
Heist Battleground: Mars Security Drone 2
Source: Shacknews
This drone is near Warmind Tower A, behind Annihilator Totem and Shrieker.
Heist Battleground: Mars Security Drone 3
Source: Shacknews
When all three Warmind Towers are clear, head inside the building and up the stairs near the entrance. The drone is at the top of the diagonal support beams.
Heist Battleground: Mars Security Drone 4
Source: Shacknews
After holding out while Ghost hacks the door, work your way outside and jump over to the main Warmind structure. Don’t jump around to the other side, instead, go to the right to spot the drone beside some stairs.
Heist Battleground: Mars Security Drone 5
Source: Shacknews
This drone is right before you walk up the power cables close to the Hive tomb ships and Warmind tower. Look toward the ships and then up in the rafters.
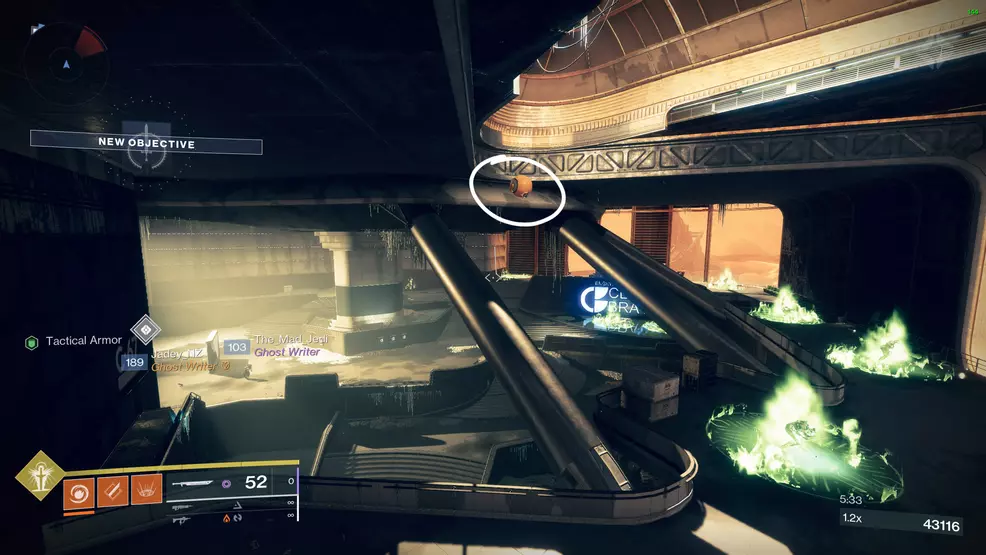
Heist Battleground: Mars Security Drone 6
Source: Shacknews
The last security drone is right before entering the Warmind structure proper. It is on top of the walls that slant inwards.
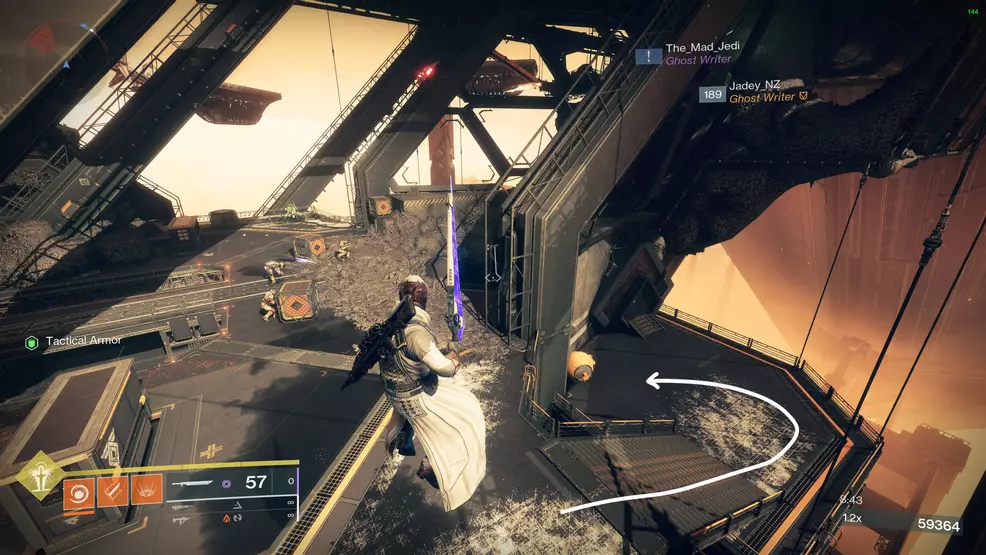
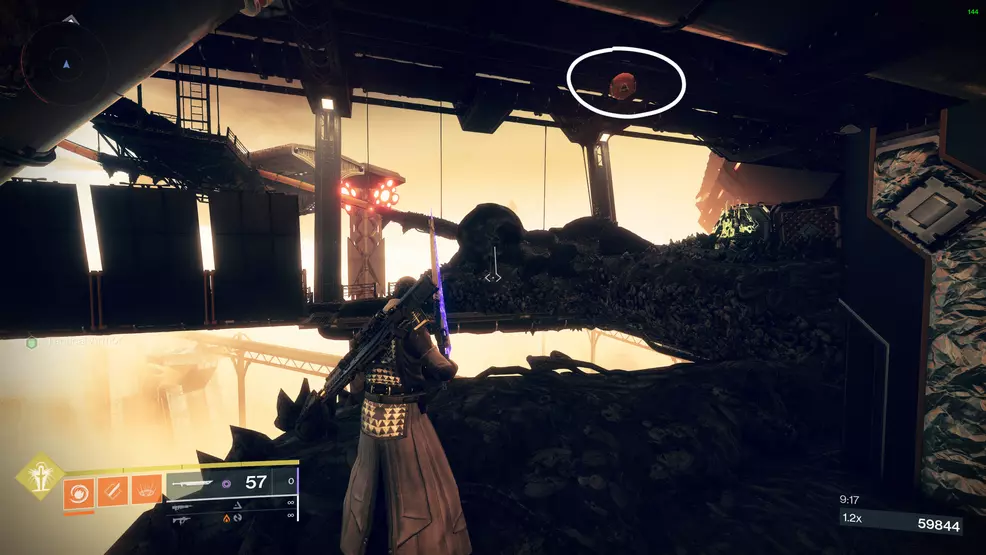
Heist Battleground: Europa Security Drones
Heist Battleground: Europa Security Drone 1
Source: Shacknews
The first security drone during Heist Battleground: Europa is at the entrance to Bray Exoscience. The easiest way to get this is to go past all the Warmind laser towers to the destroyed entrance and turn around. The drone is at the edge of the cliff near a Fallen platform.
Heist Battleground: Europa Security Drone 2
Source: Shacknews
This drone is in the main room with the first Hive Cryptolith. As you enter, look up to the left to see it peeking over the top of the wall.
Heist Battleground: Europa Security Drone 3
Source: Shacknews
After the first Hive Cryptolith, you’ll go through some tunnels. Look for the red hallway that turns left – the drone is behind some boxes on your right.
Heist Battleground: Europa Security Drone 4
Source: Shacknews
Find this drone in the room where the hovering trams are flying along the right-hand side. The yellow ball is below the catwalk on the left.
Heist Battleground: Europa Security Drone 5

Source: Shacknews
As you reach the section where you must fall down a huge drop, look for the Annihilator Totem on the left. The drone is over the edge behind the totem.
Heist Battleground: Europa Security Drone 6
Source: Shacknews
The last security drone is in the room with the giant Clovis head. It’s in the corner to the right.
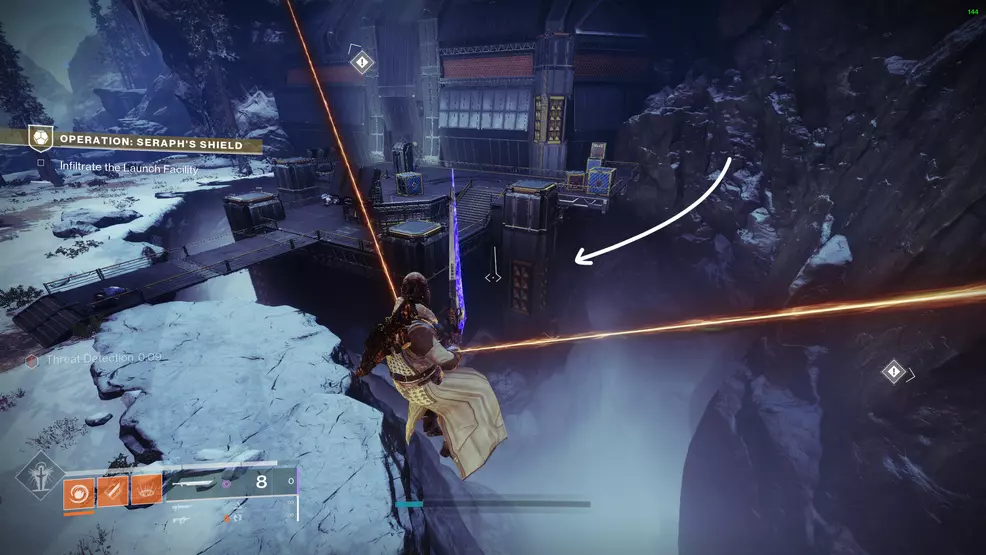
Operation: Seraph’s Shield Security Drones
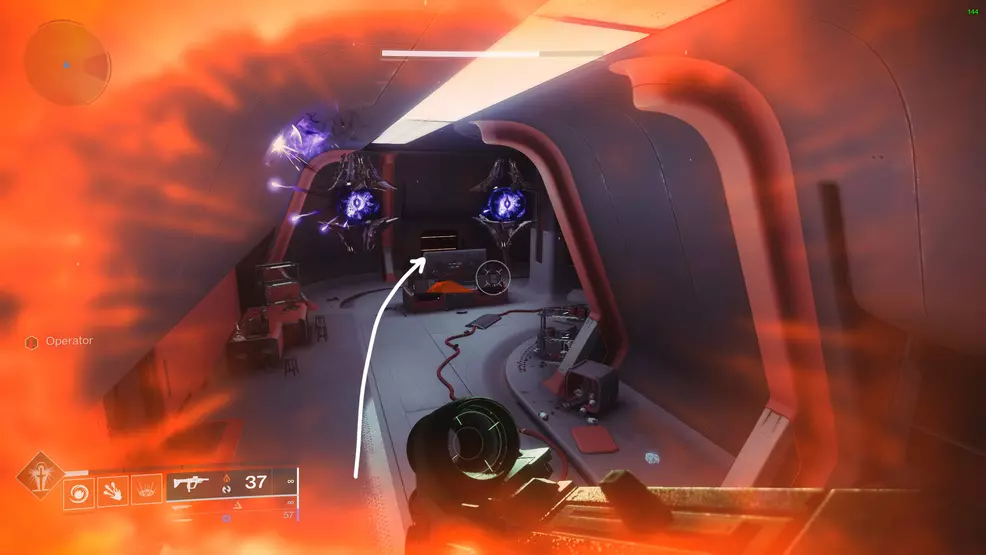
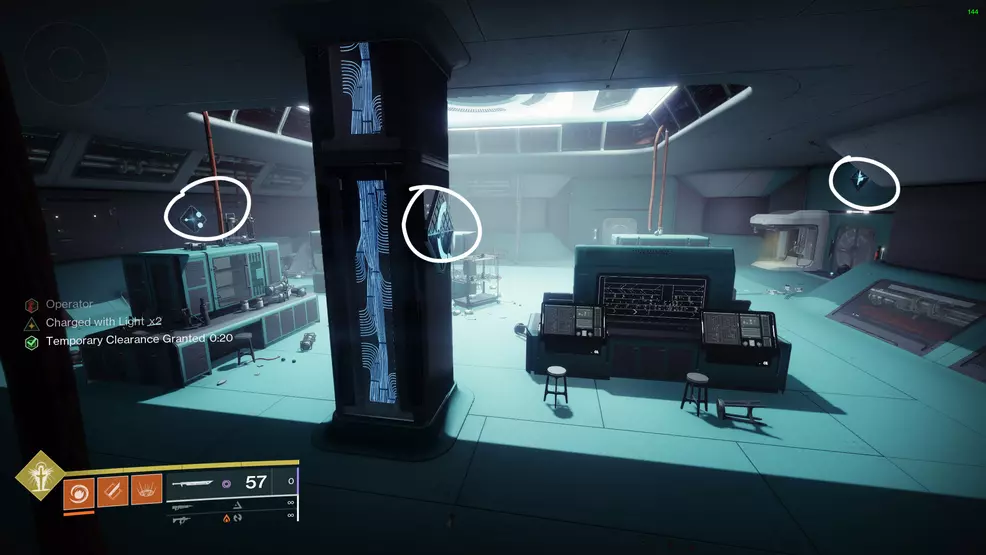
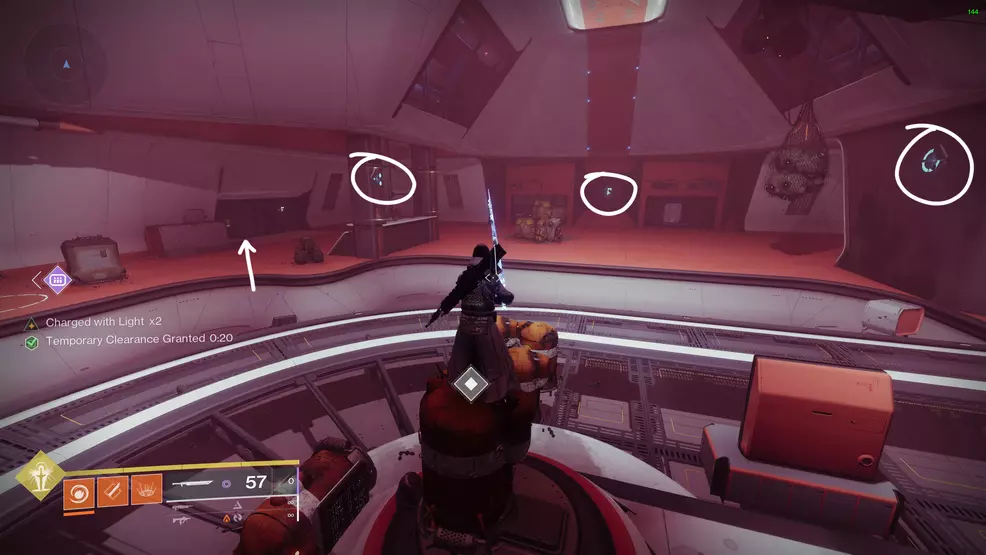
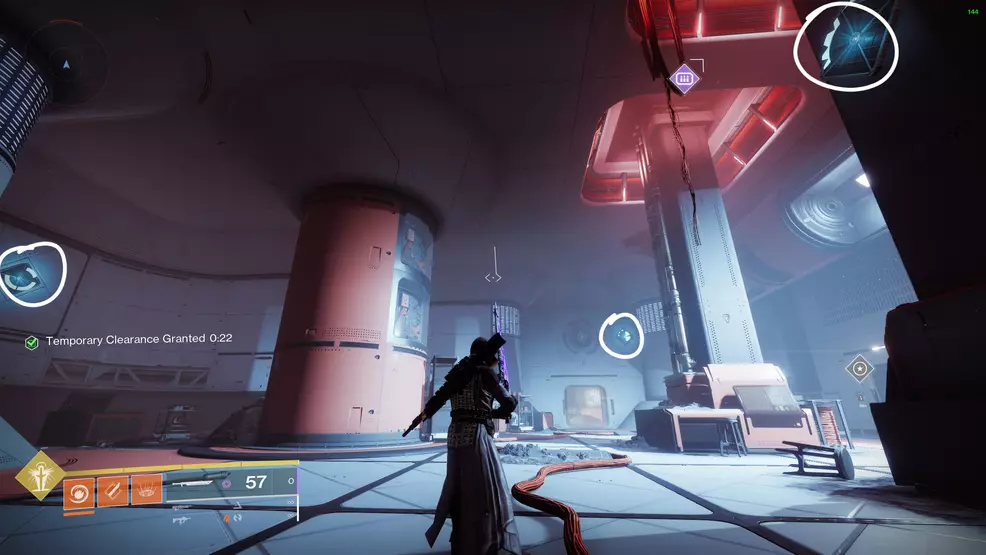
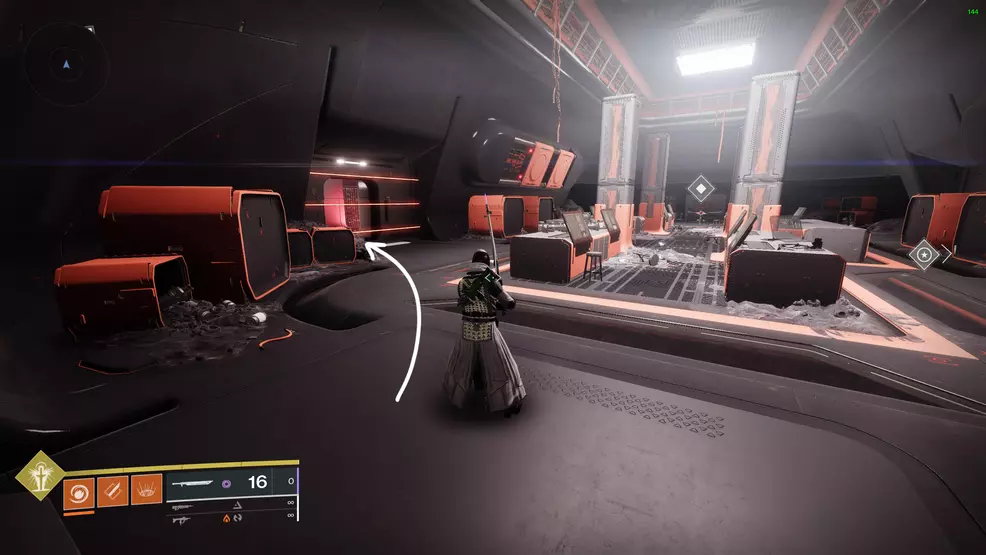
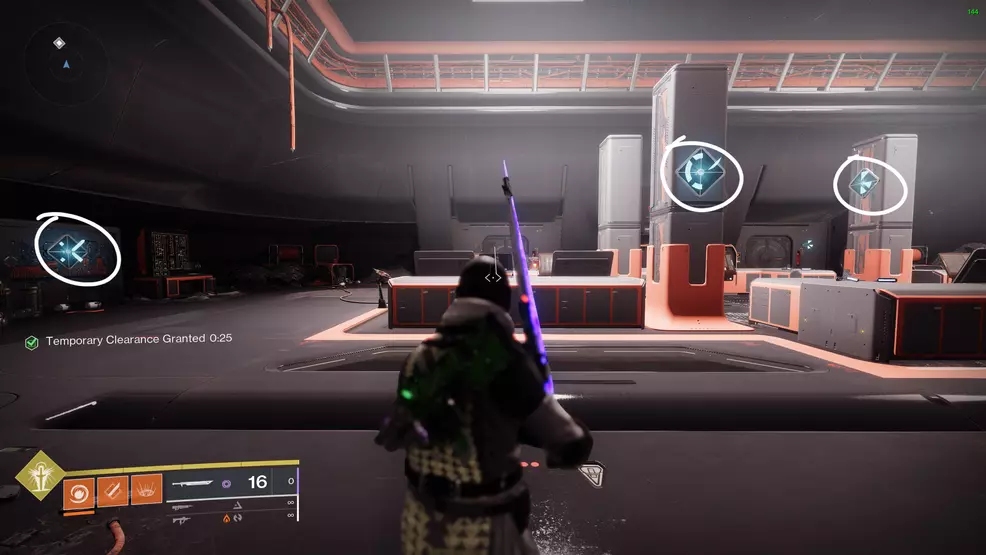
The security drones in Operation: Seraph's Shield are only accessible if you have the Tactical Armor and Security Clearance upgrades from the Exo Frame. These are awarded for completing steps in the More Than a Weapon questline. Most of these security drones are locked behind puzzle terminals. To solve them, interact with the terminal and look for three holograms in the immediate vicinity. The terminal will show the first hologram to shoot. The terminal will then show a combination of the first and second hologram, so you must distinguish which shapes match the second hologram and shoot it. Then just shoot the last one.
Operation: Seraph’s Shield Security Drone 1
Source: Shacknews
Source: Shacknews
At the start of the mission, work your way to the entrance where the ogre spawns. There is a secret room below the platform, accessible via a hole over the edge on the right. Interact with the hologram to spawn three holographs. Destroy them in the correct order to reveal the yellow security drone.
Operation: Seraph’s Shield Security Drone 2
Source: Shacknews
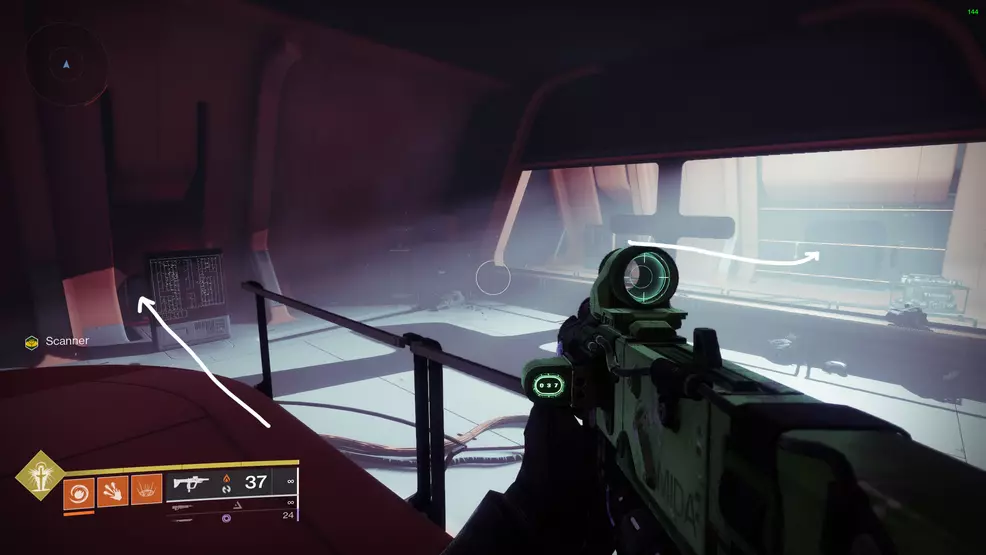
The next security drone is found when you pick up the Scanner augment for the second time. Shanks will come out of a door way and you will see a terminal behind glass and three lasers blocking a door. Go through the vent on the left to reach the terminal and go through the lasers to find the drone.
Operation: Seraph’s Shield Security Drone 3
Source: Shacknews
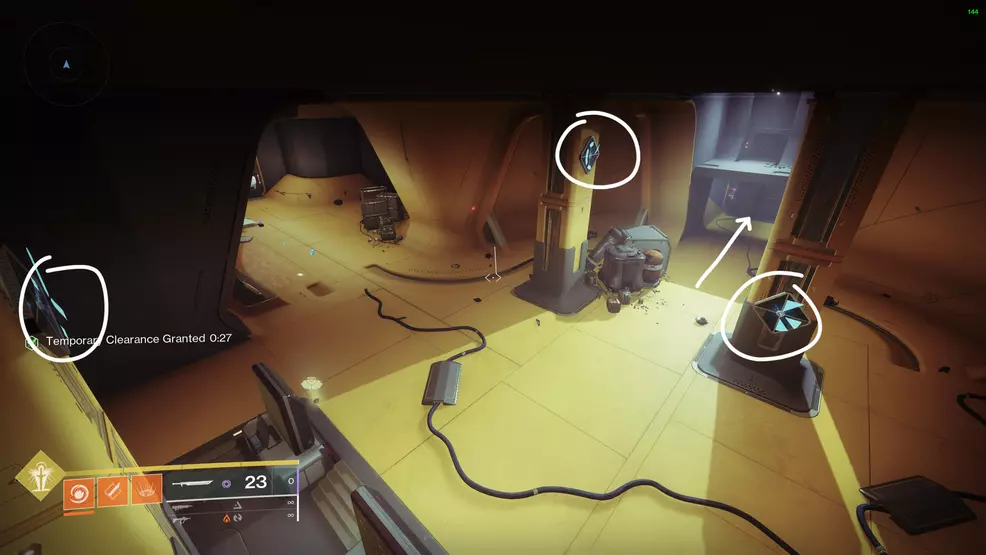
After you deposit the second Scanner buff near the Servitor and go into the yellow room, there will be a third Scanner Vandal and a door to your right. Interact with the terminal to make three holograms appear on the pillars. Shoot them in the correct order to unlock the door and find the security drone.
Operation: Seraph’s Shield Security Drone 4
Source: Shacknews
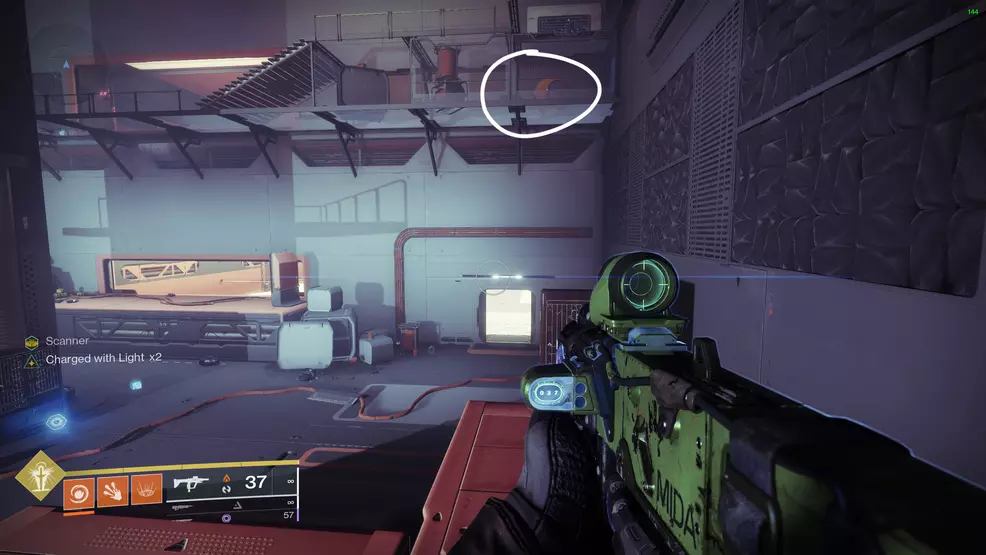
This security drone is in the room before the floor tile puzzle. The drone is directly above the door to the floor puzzle, behind glass under the stairs. Reach it by jumping through the missing panel.
Operation: Seraph’s Shield Security Drone 5
Source: Shacknews
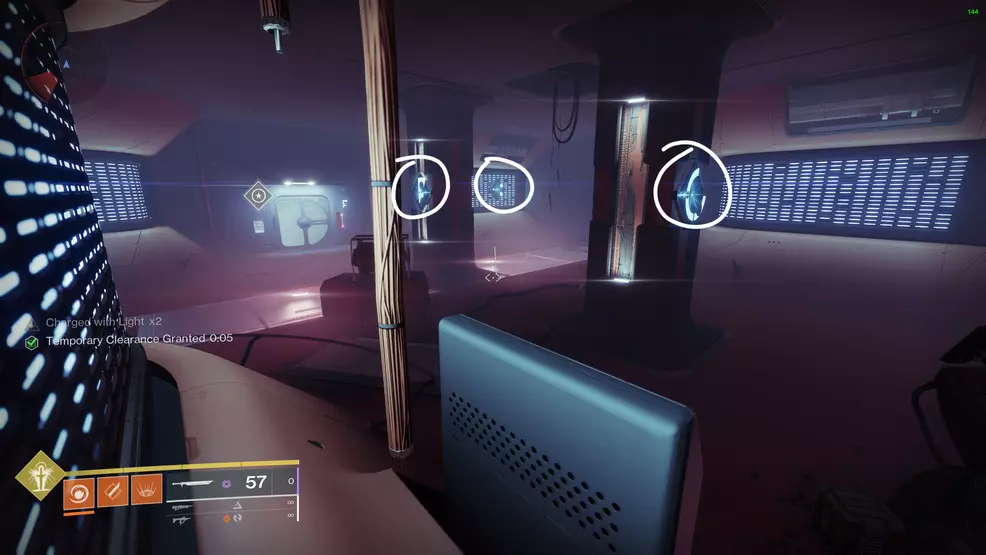
Find this drone in the same room as the first Operator buff. Activate the door with the terminal to spawn three holograms. Two are on the pillars and one is on the right wall beside where you entered.
Operation: Seraph’s Shield Security Drone 6
Source: Shacknews
Source: Shacknews
The next drone is immediately after you get the Operator buff, behind two Shriekers. Shoot the panel to unlock the room, go into the red room on the left and shoot the panel behind the glass. With the door open, destroy the Shriekers and go through the door behind them. Run through the lasers and follow the path as it wraps around to find the security drone.
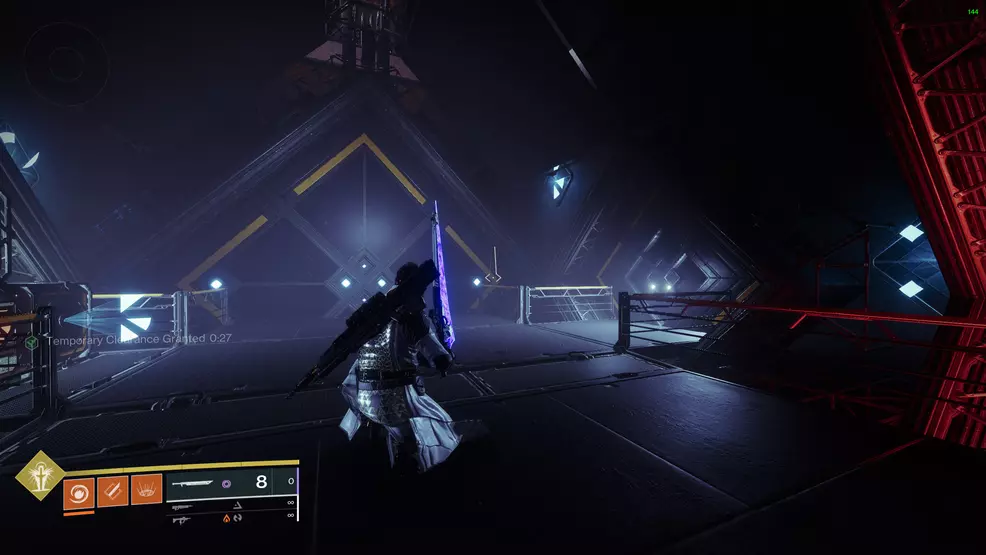
Operation: Seraph’s Shield Security Drone 7
Source: Shacknews
Source: Shacknews
In the room where you must deposit the first Operator augmentation. This room contains a couple of turrets, a Fallen Captain, and a Servitor will spawn. Look for the locked vent with the hologram puzzle. The holograms spawn on the pillar, above the exit, and beside the vent. Shoot the holograms in the correct order to open the vent, revealing the yellow orb.
Operation: Seraph’s Shield Security Drone 8
Source: Shacknews
Find this drone in the first boss room where you must explode the barrels. As you enter, go left to find a door with a hologram terminal puzzle. The holograms are on the left side of the boss arena: one on the wall in front of the door, another opposite the door, the last on the left-most wall.
Operation: Seraph’s Shield Security Drone 9
Source: Shacknews
This security drone is at the end of the jumping section after you go outside the space station. Jump along to the end to find a hangar full of Hive, including two large Ogres. On the left is a doorway with three lasers across it – the drone is through here.
Operation: Seraph’s Shield Security Drone 10
Source: Shacknews
Source: Shacknews
Find this drone in the room right before the final boss fight. This room is after you deposit the Suppressor augment and it contains a rally banner point. Look for the hologram puzzle door on the left. The holograms are above the entrance, on the far pillar, and on the right wall.
Operation: Seraph’s Shield Security Drone 11
Source: Shacknews
The second last security drone is after the last boss, in the room where you upload the virus. Go through the laser door on the left to find the yellow ball.
Operation: Seraph’s Shield Security Drone 12
Source: Shacknews
The final security drone is after the last boss fight, in the room where you upload the virus. Look for the locked door on the right – this is the final hologram door. Interact with it to summon three holograms: two on the pillars and one at the far end. Shoot them in the correct order to open the door, revealing the last yellow security drone.

Source: Shacknewss
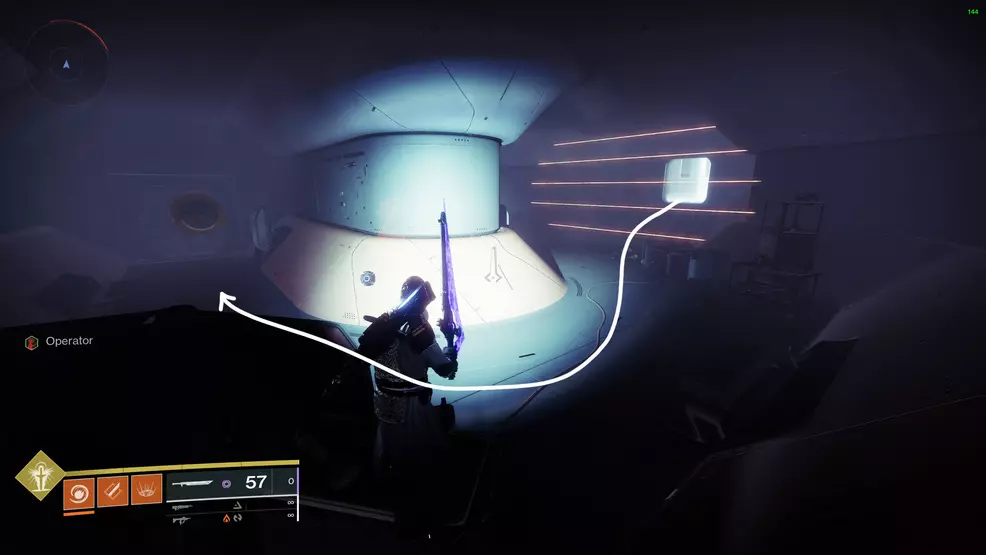
Once all the security drones are destroyed, you will be able to access a previously locked door in the Operation: Seraph’s Shield mission. The door is where you defeat the first boss after the spacewalk. Fight over the outside of the station and back inside. Defeat the boss that spawns between the four pillars and look to the left to spot the door. If you destroyed all the drones all the lights should be activated. Inside is the mechanical dog. Find the dog and next time you return to the Exo Frame in the H.E.L.M., you will be able to pet it for the Guardian’s Best Friend Triumph.
Finding and destroying all of the security drones during Season of the Seraph is going to take a bit of effort. However, it’s necessary if you want the Seraph Title. Stop by the Shacknews Destiny 2 strategy guide for more collectible information.


-
Shacknews

 reply
replySam Chandler posted a new article, All Security Drone locations - Destiny 2

